Get Started with Catalog
- IDP 2.0 (New)
- IDP 1.0
If you're using Harness IDP 2.0, please ensure you have reviewed the IDP 2.0 Overview guide and are familiar with the key steps for upgrading to IDP 2.0. To enable IDP 2.0, you must raise a support ticket to activate the IDP_2_0 feature flag for your account.
The Software Catalog is a centralized registry of all your software assets — including components, services, websites, libraries, data pipelines, and more. Think of it as a curated directory of your entities, helping you efficiently track ownership, metadata, and dependencies across your software ecosystem.
This guide walks you through the key changes introduced in IDP 2.0 and explains how to navigate the Catalog by creating and managing entities.
What’s New in IDP 2.0?
Harness IDP 2.0 introduces a major upgrade to the Software Catalog. Built on a Harness-native data model, it is designed to support enterprise-scale needs with robust access control. Key improvements include:
- Harness-native Platform Hierarchy: Entities now support Account, Org, and Project scopes with fine-grained RBAC controls.
- No YAML Required: Entities can be created and managed entirely via the UI—no manual YAML editing or GitOps needed.
- Revamped UI: A modern interface featuring updated Catalog tables, advanced filtering, smooth navigation, and inline entity creation.
Prerequisites (IDP 2.0)
Before using the Software Catalog in IDP 2.0, ensure:
- You have reviewed the IDP 2.0 Overview and Upgrading to IDP 2.0 guide.
- IDP 2.0 is enabled behind the
IDP_2_0Feature Flag. Contact Harness Support to enable it on your account. - You are familiar with the Catalog Data Model and Catalog YAML structure.
Create an Entity (IDP 2.0)
In IDP 2.0, entity creation is simplified with full UI support and optional YAML-based creation. Entities are now “inline,” which means their entire lifecycle can be managed through the UI or API, without Git integration.
There are two ways to add and create a new entity in your catalog:
- Create an entity via the Harness IDP UI: Use the Harness UI to create entities directly—no YAML required. This method offers a streamlined, code-free experience for adding entities.
- Create an entity using your catalog YAML: You can still create entities using your existing catalog YAML files. Harness will automatically convert legacy Backstage YAML into the new Harness Catalog Entity Model and register the corresponding entity.
Let’s walk through both methods using a Component entity as an example:
- Harness IDP UI
- Catalog YAML
To create a Component via the UI:
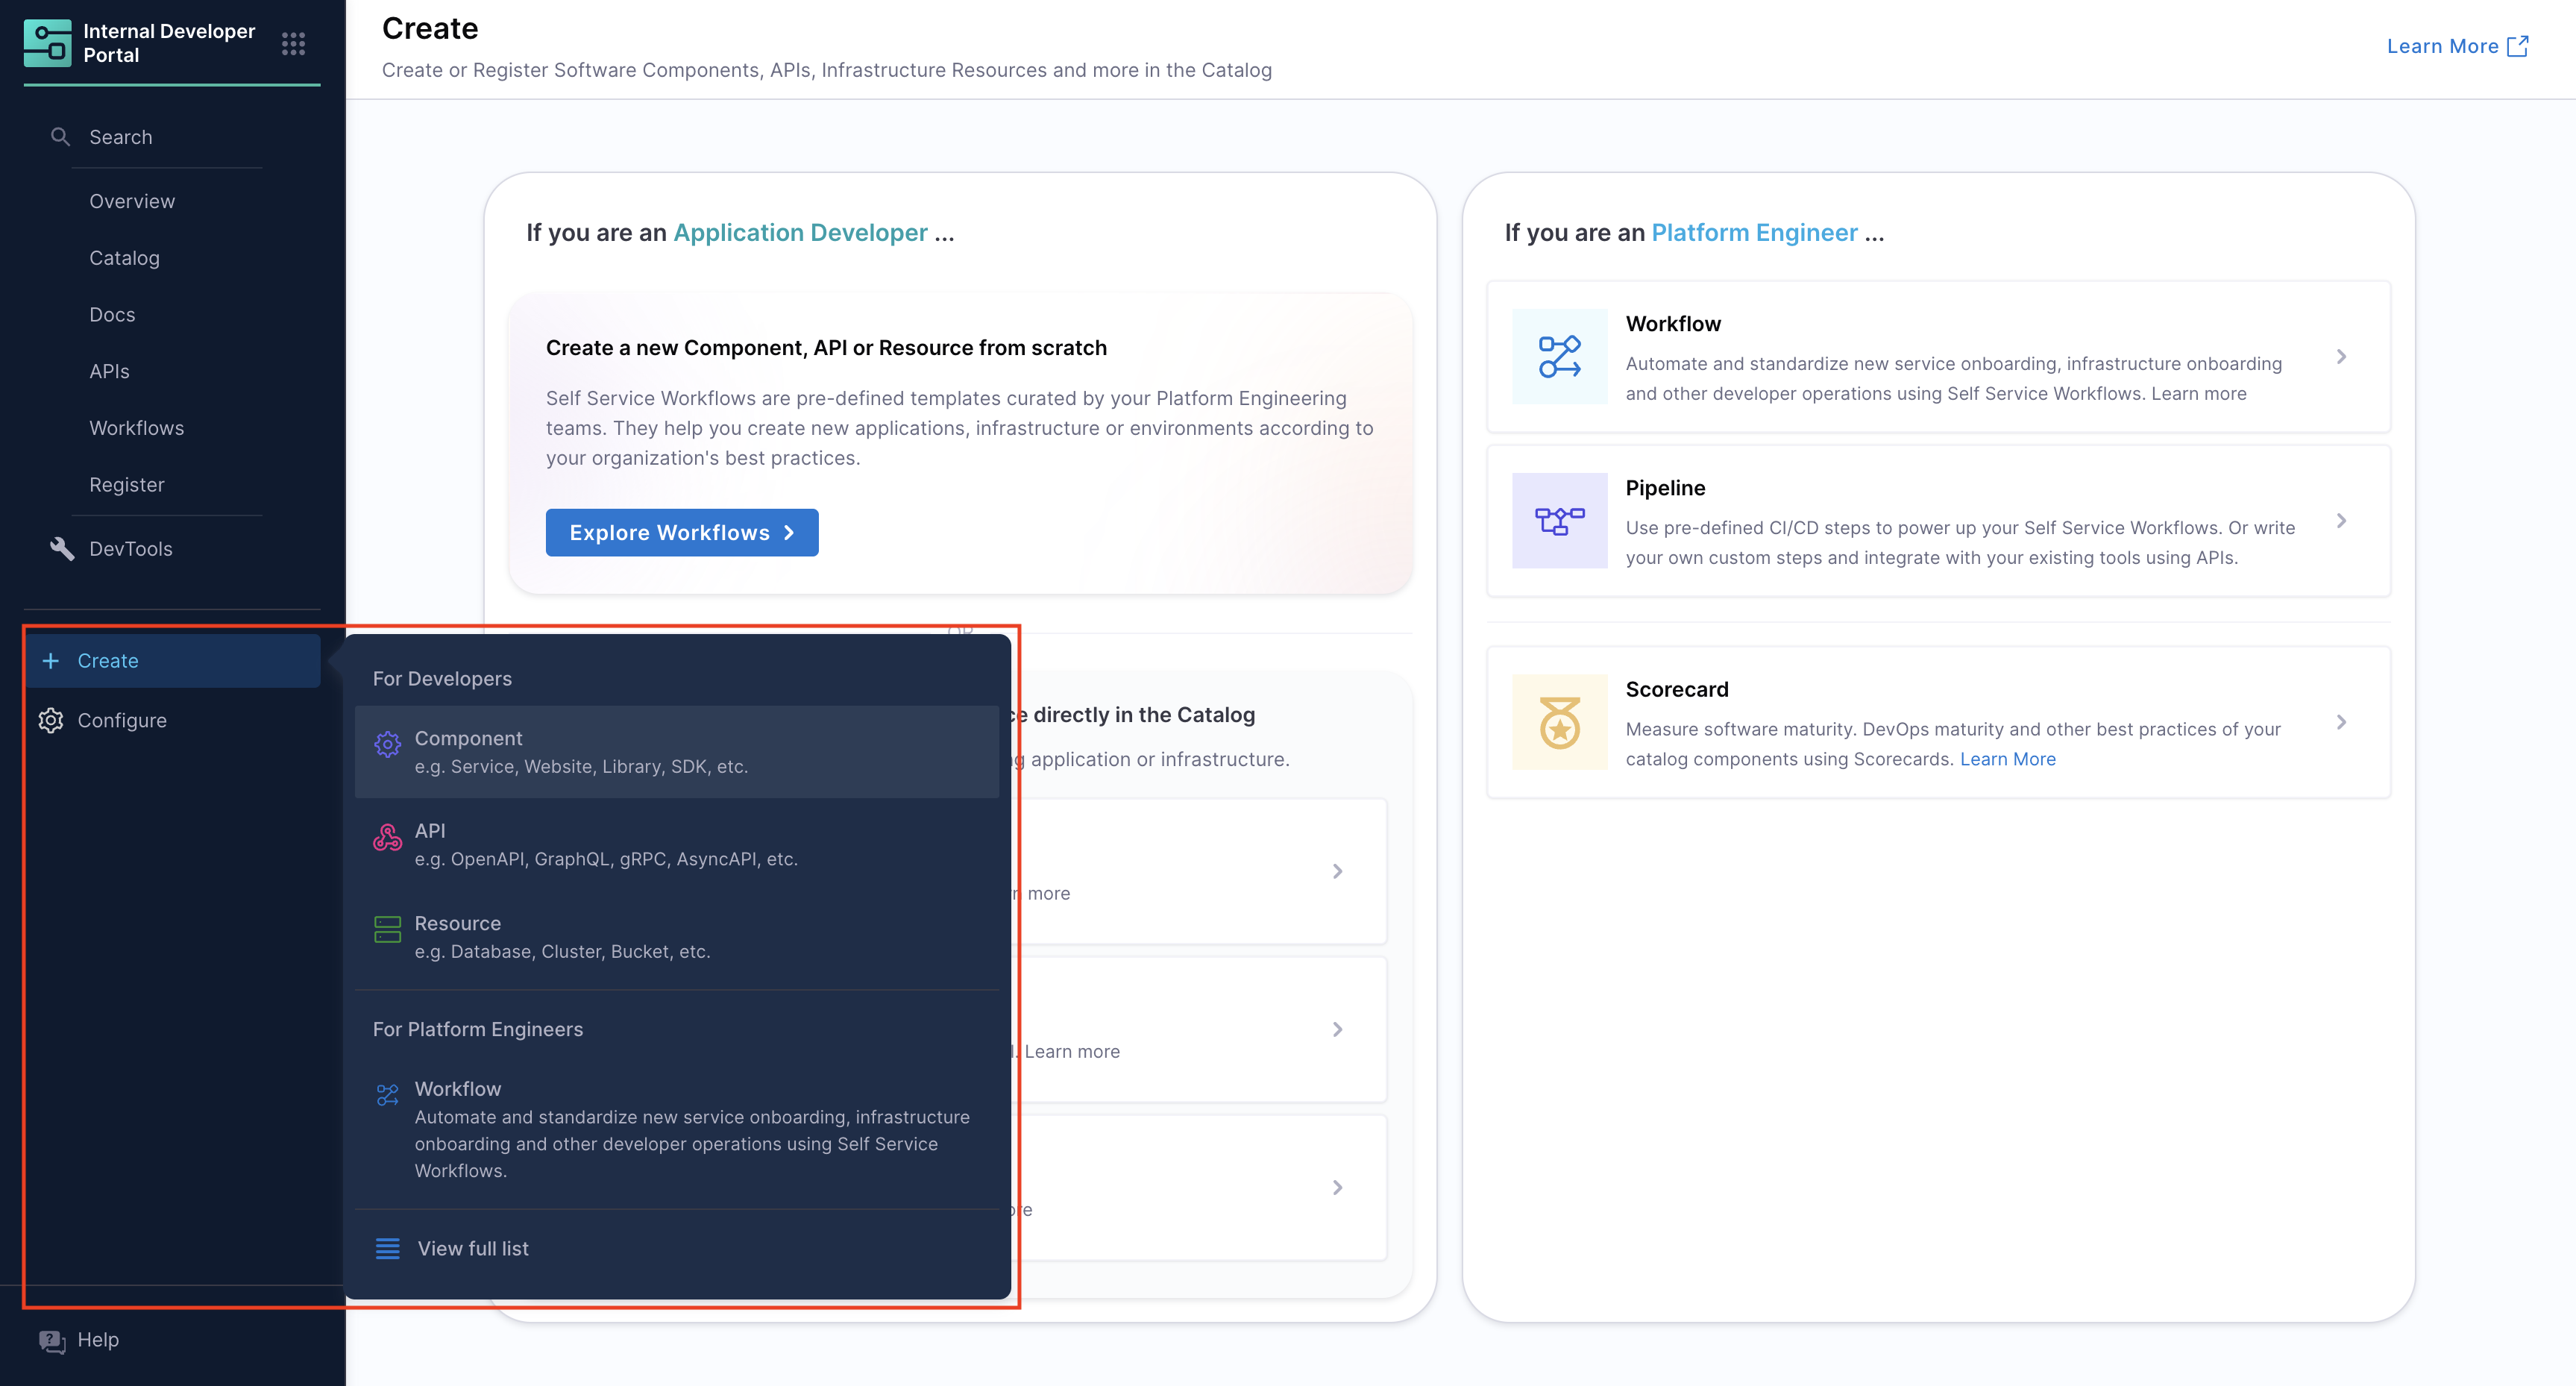
- Navigate to the Harness IDP portal and click “Create” in the sidebar.
- Select Component from the available options.
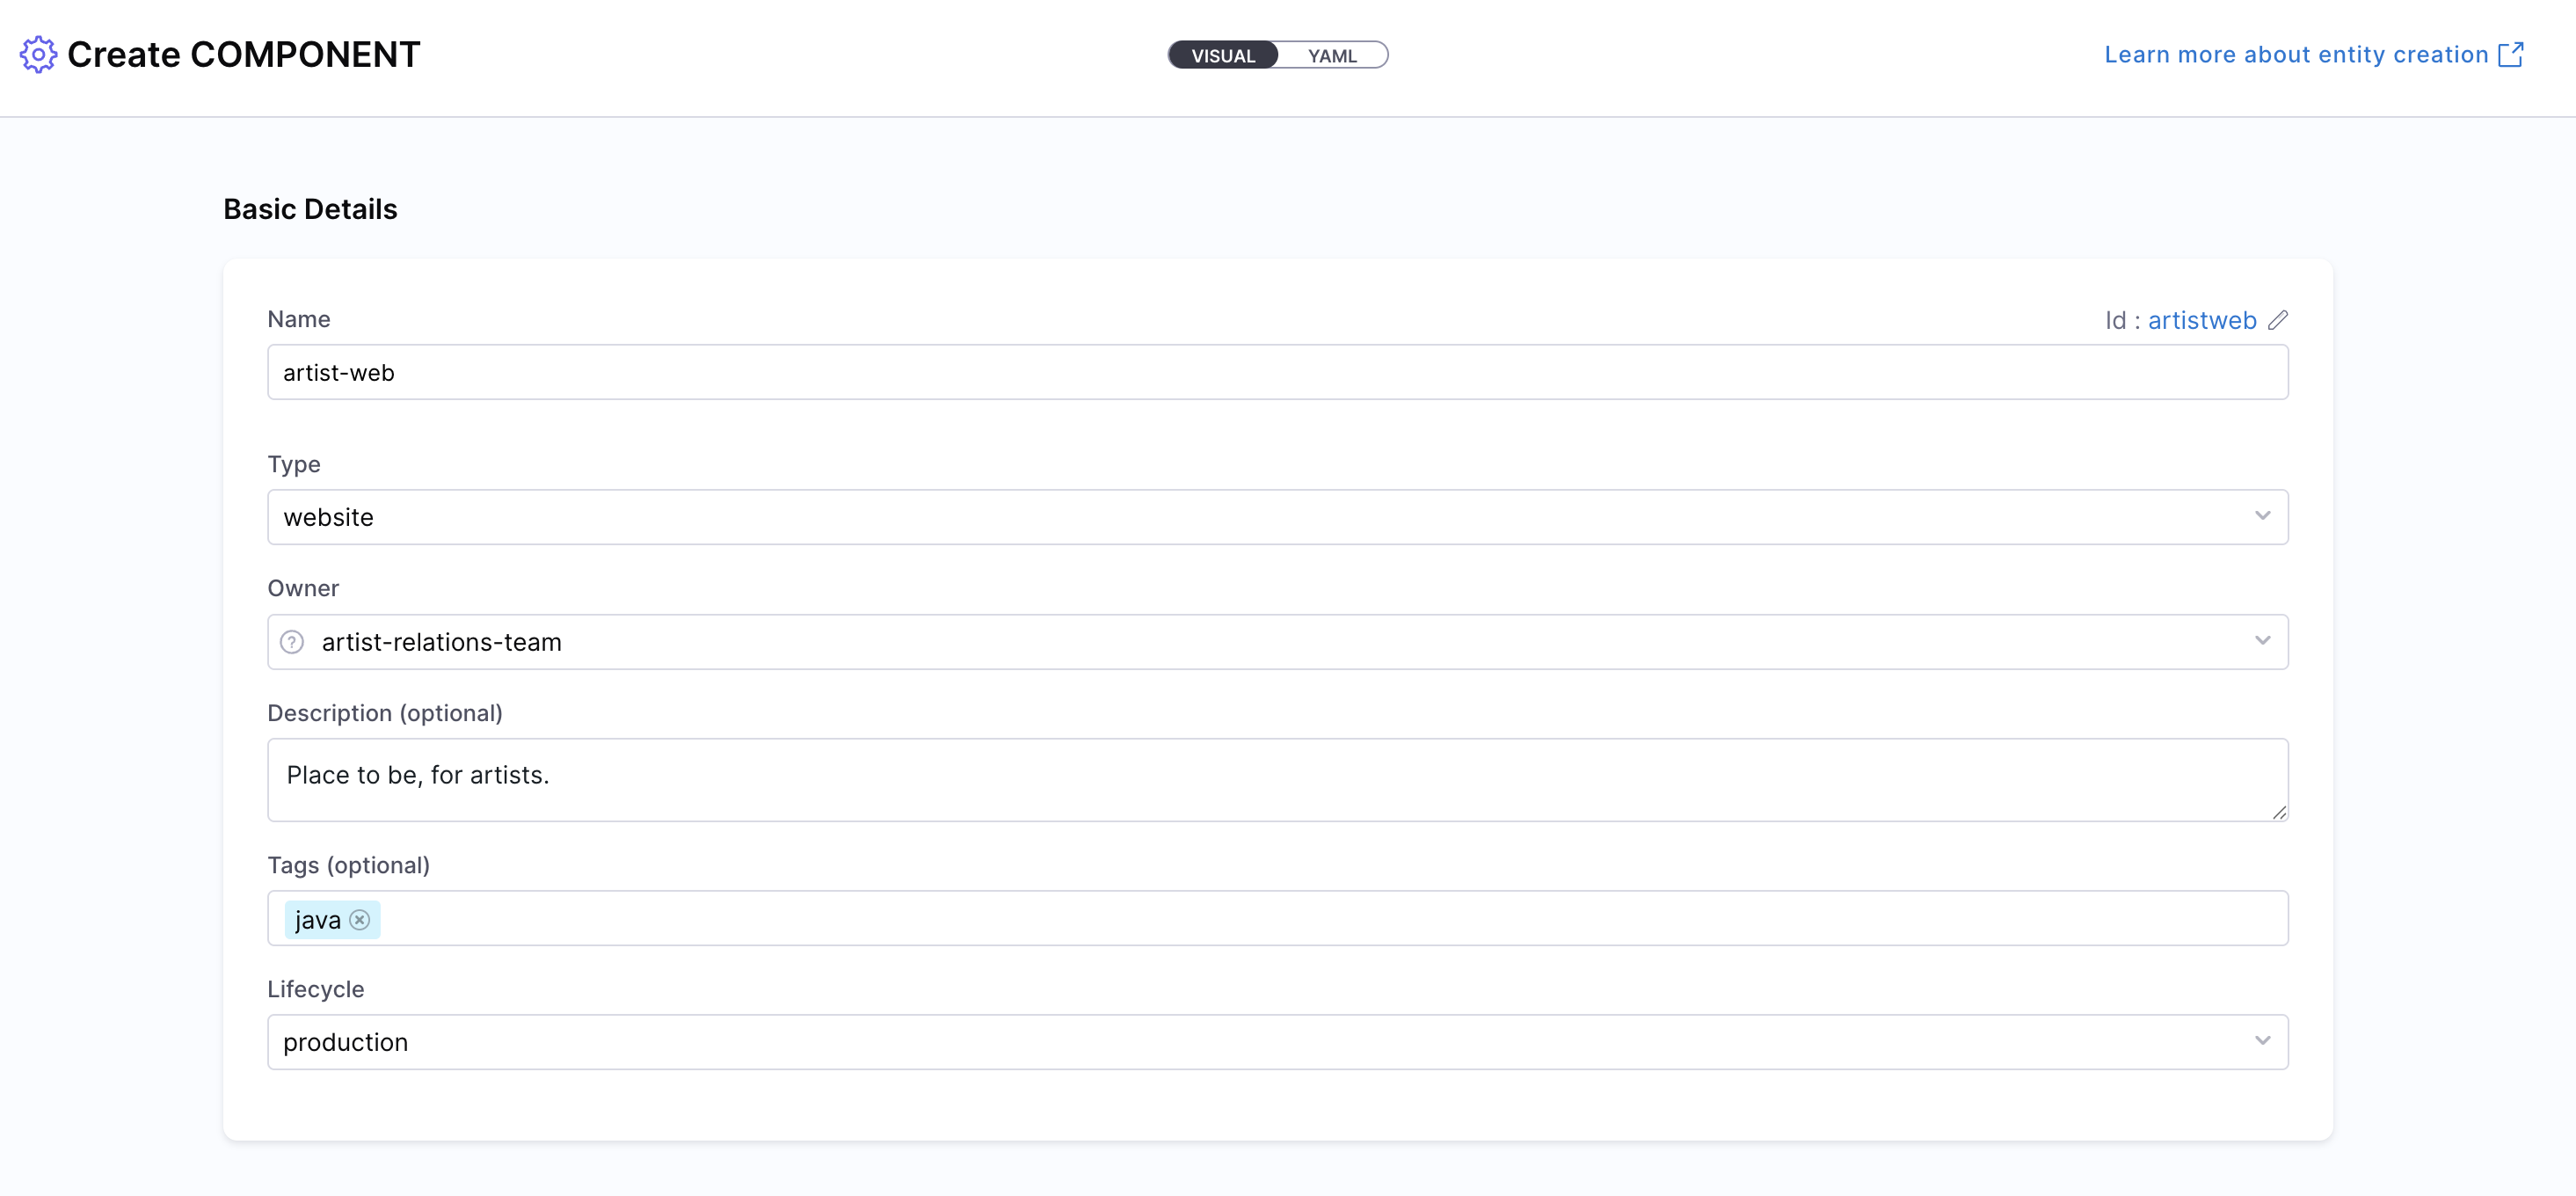
- You’ll enter the Visual View, where you can fill out entity details interactively.
- Specify the Entity Scope (Account, Org, or Project). For this example, choose Account scope. Read more about Catalog RBAC.

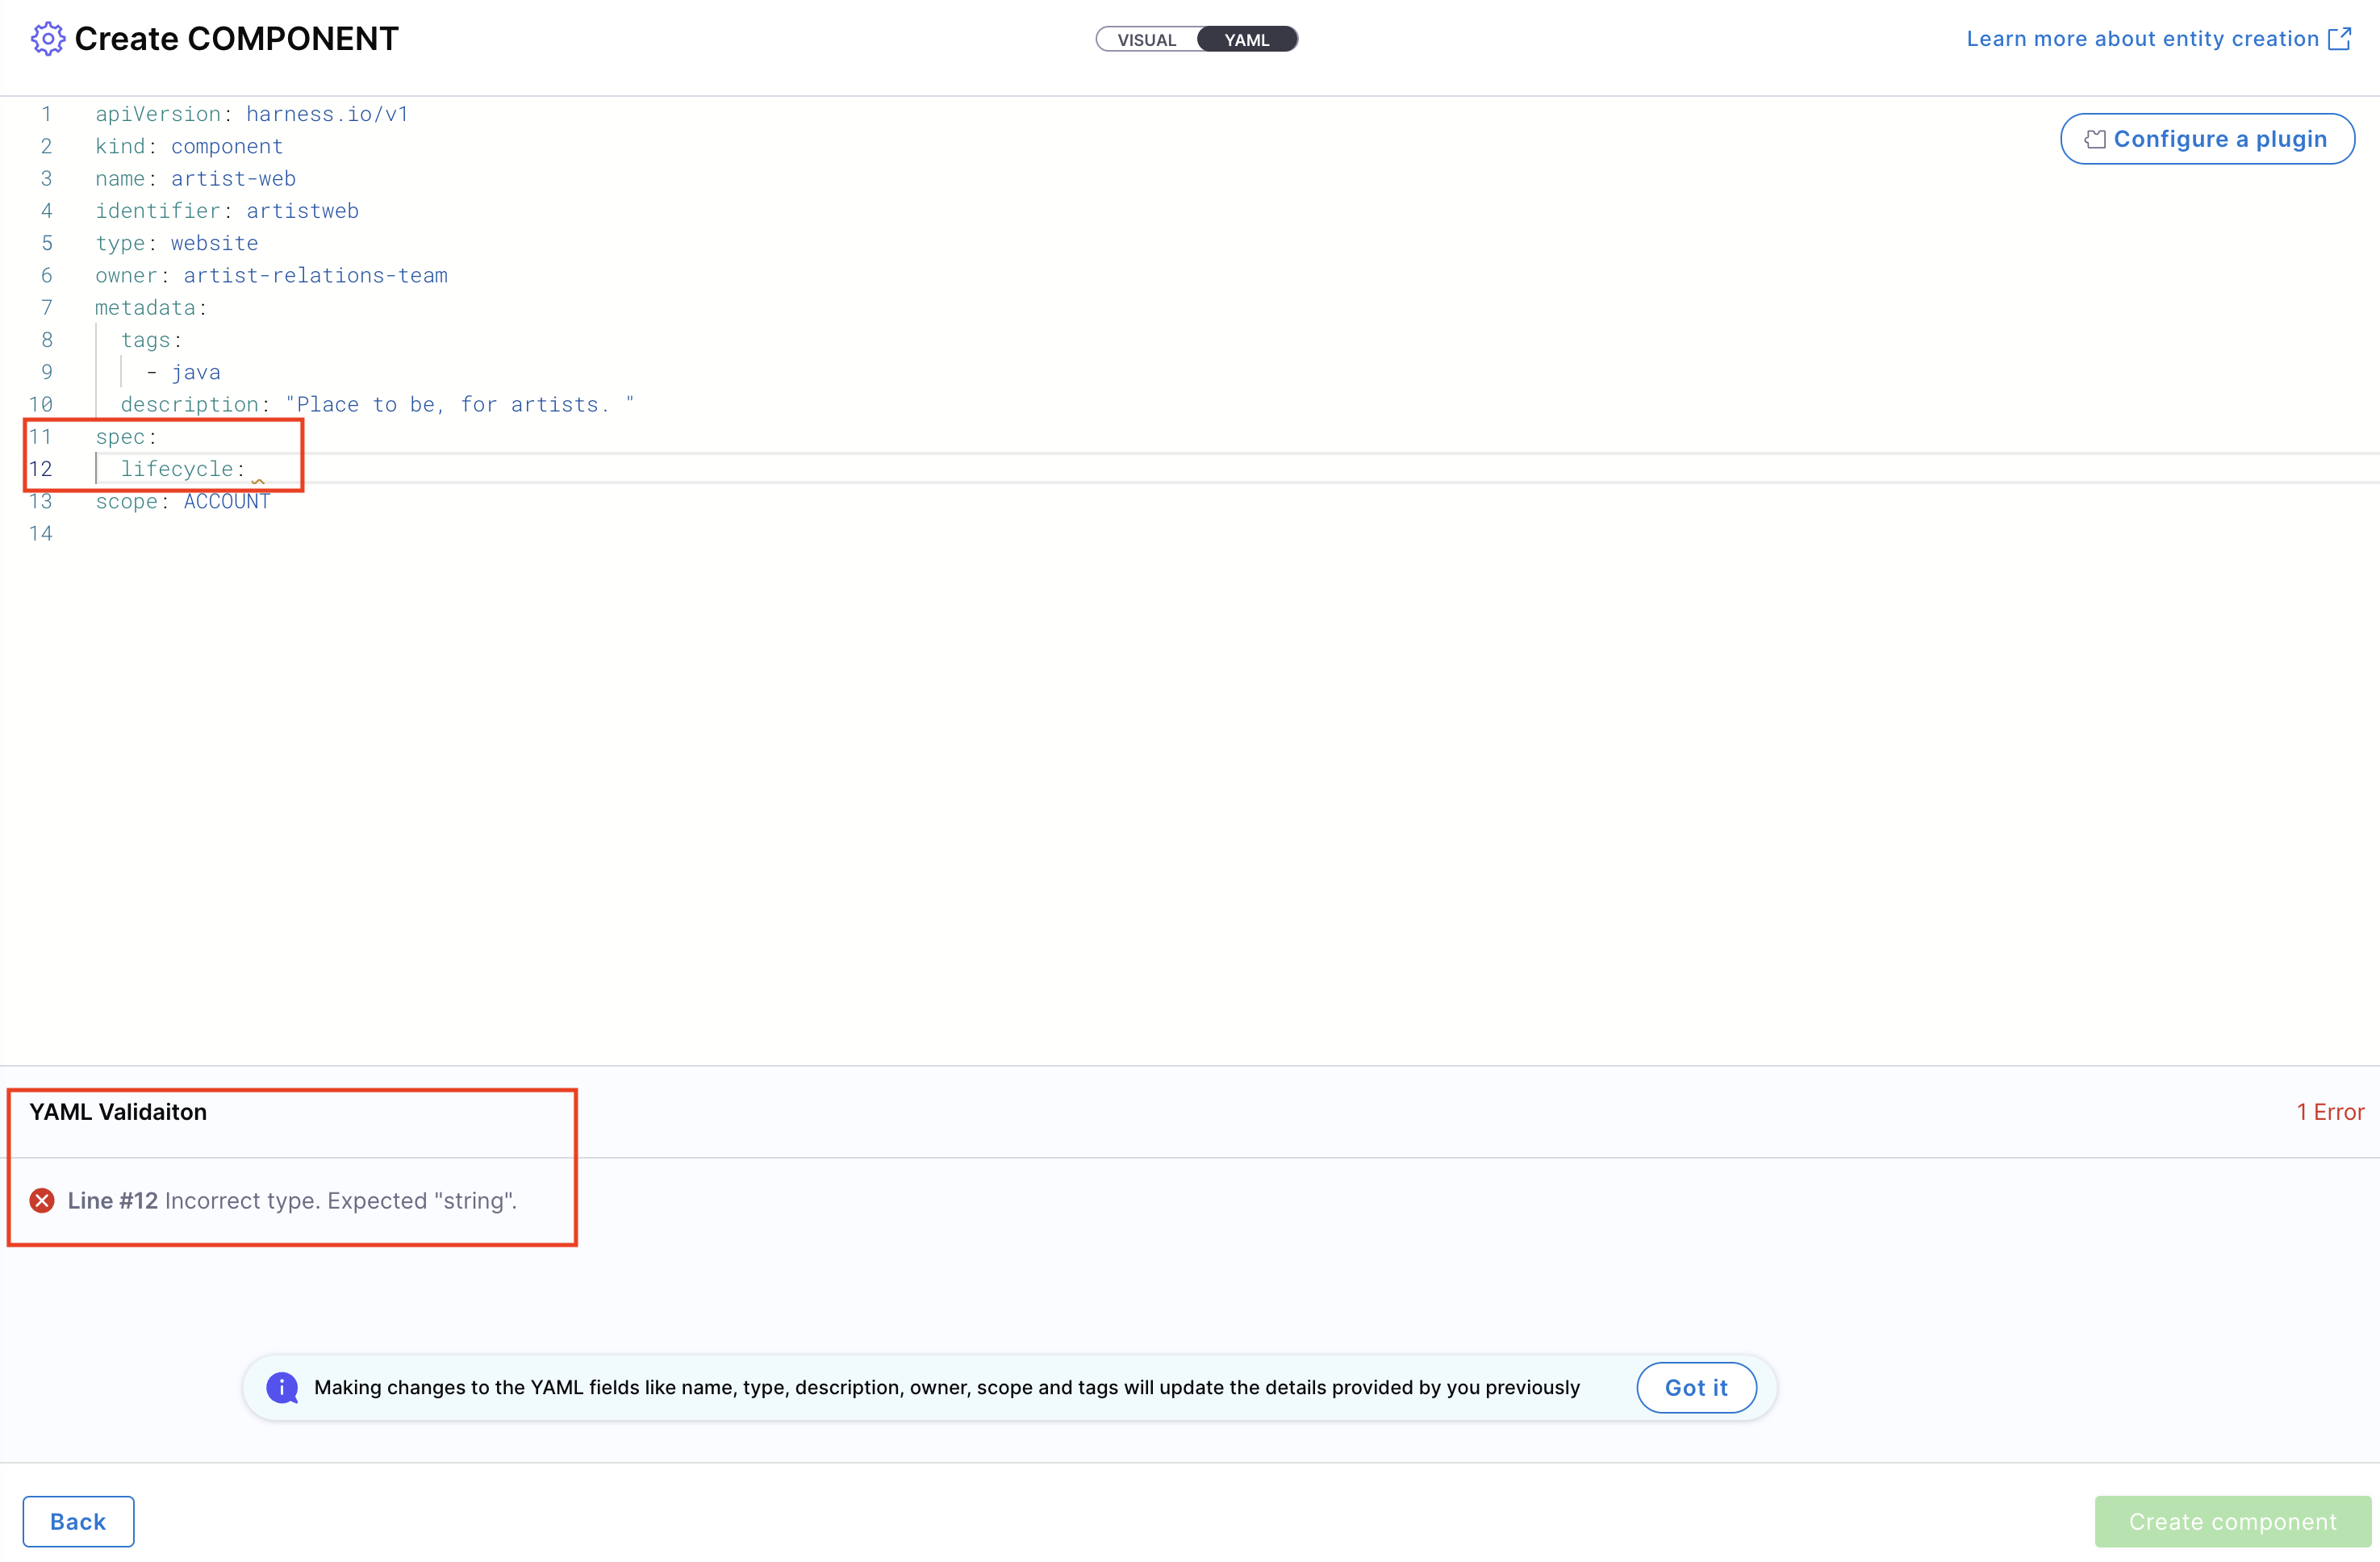
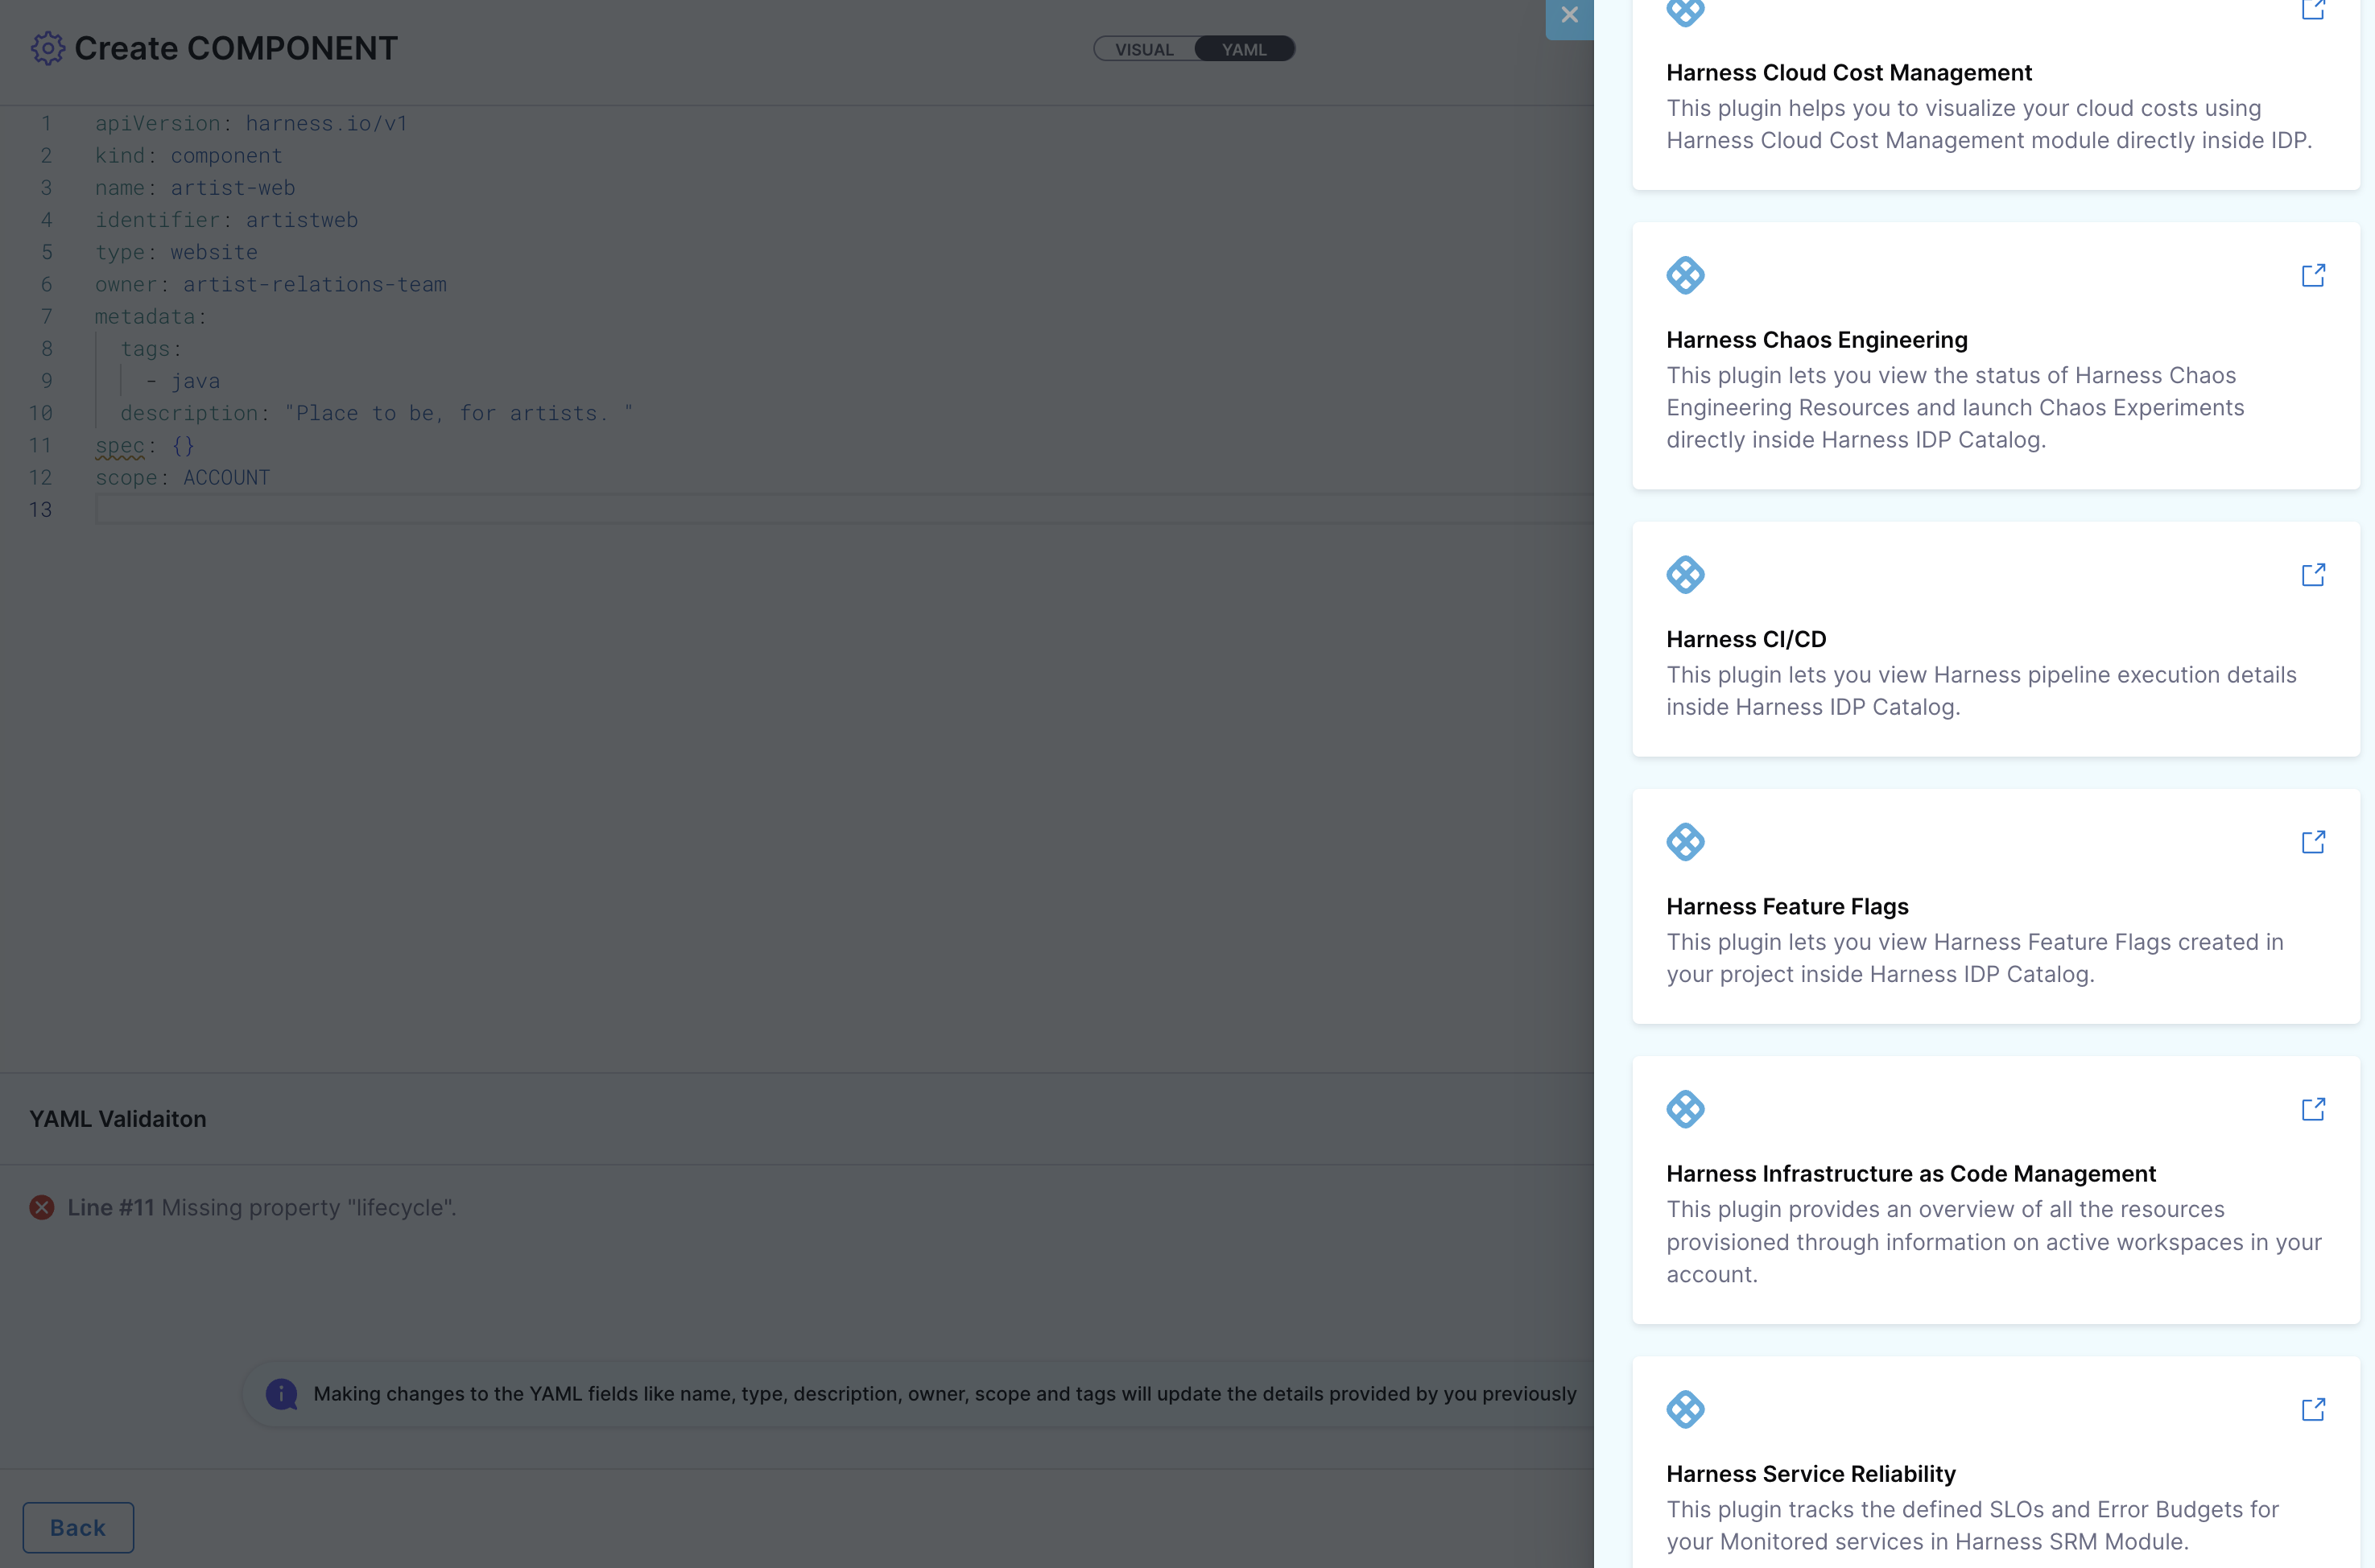
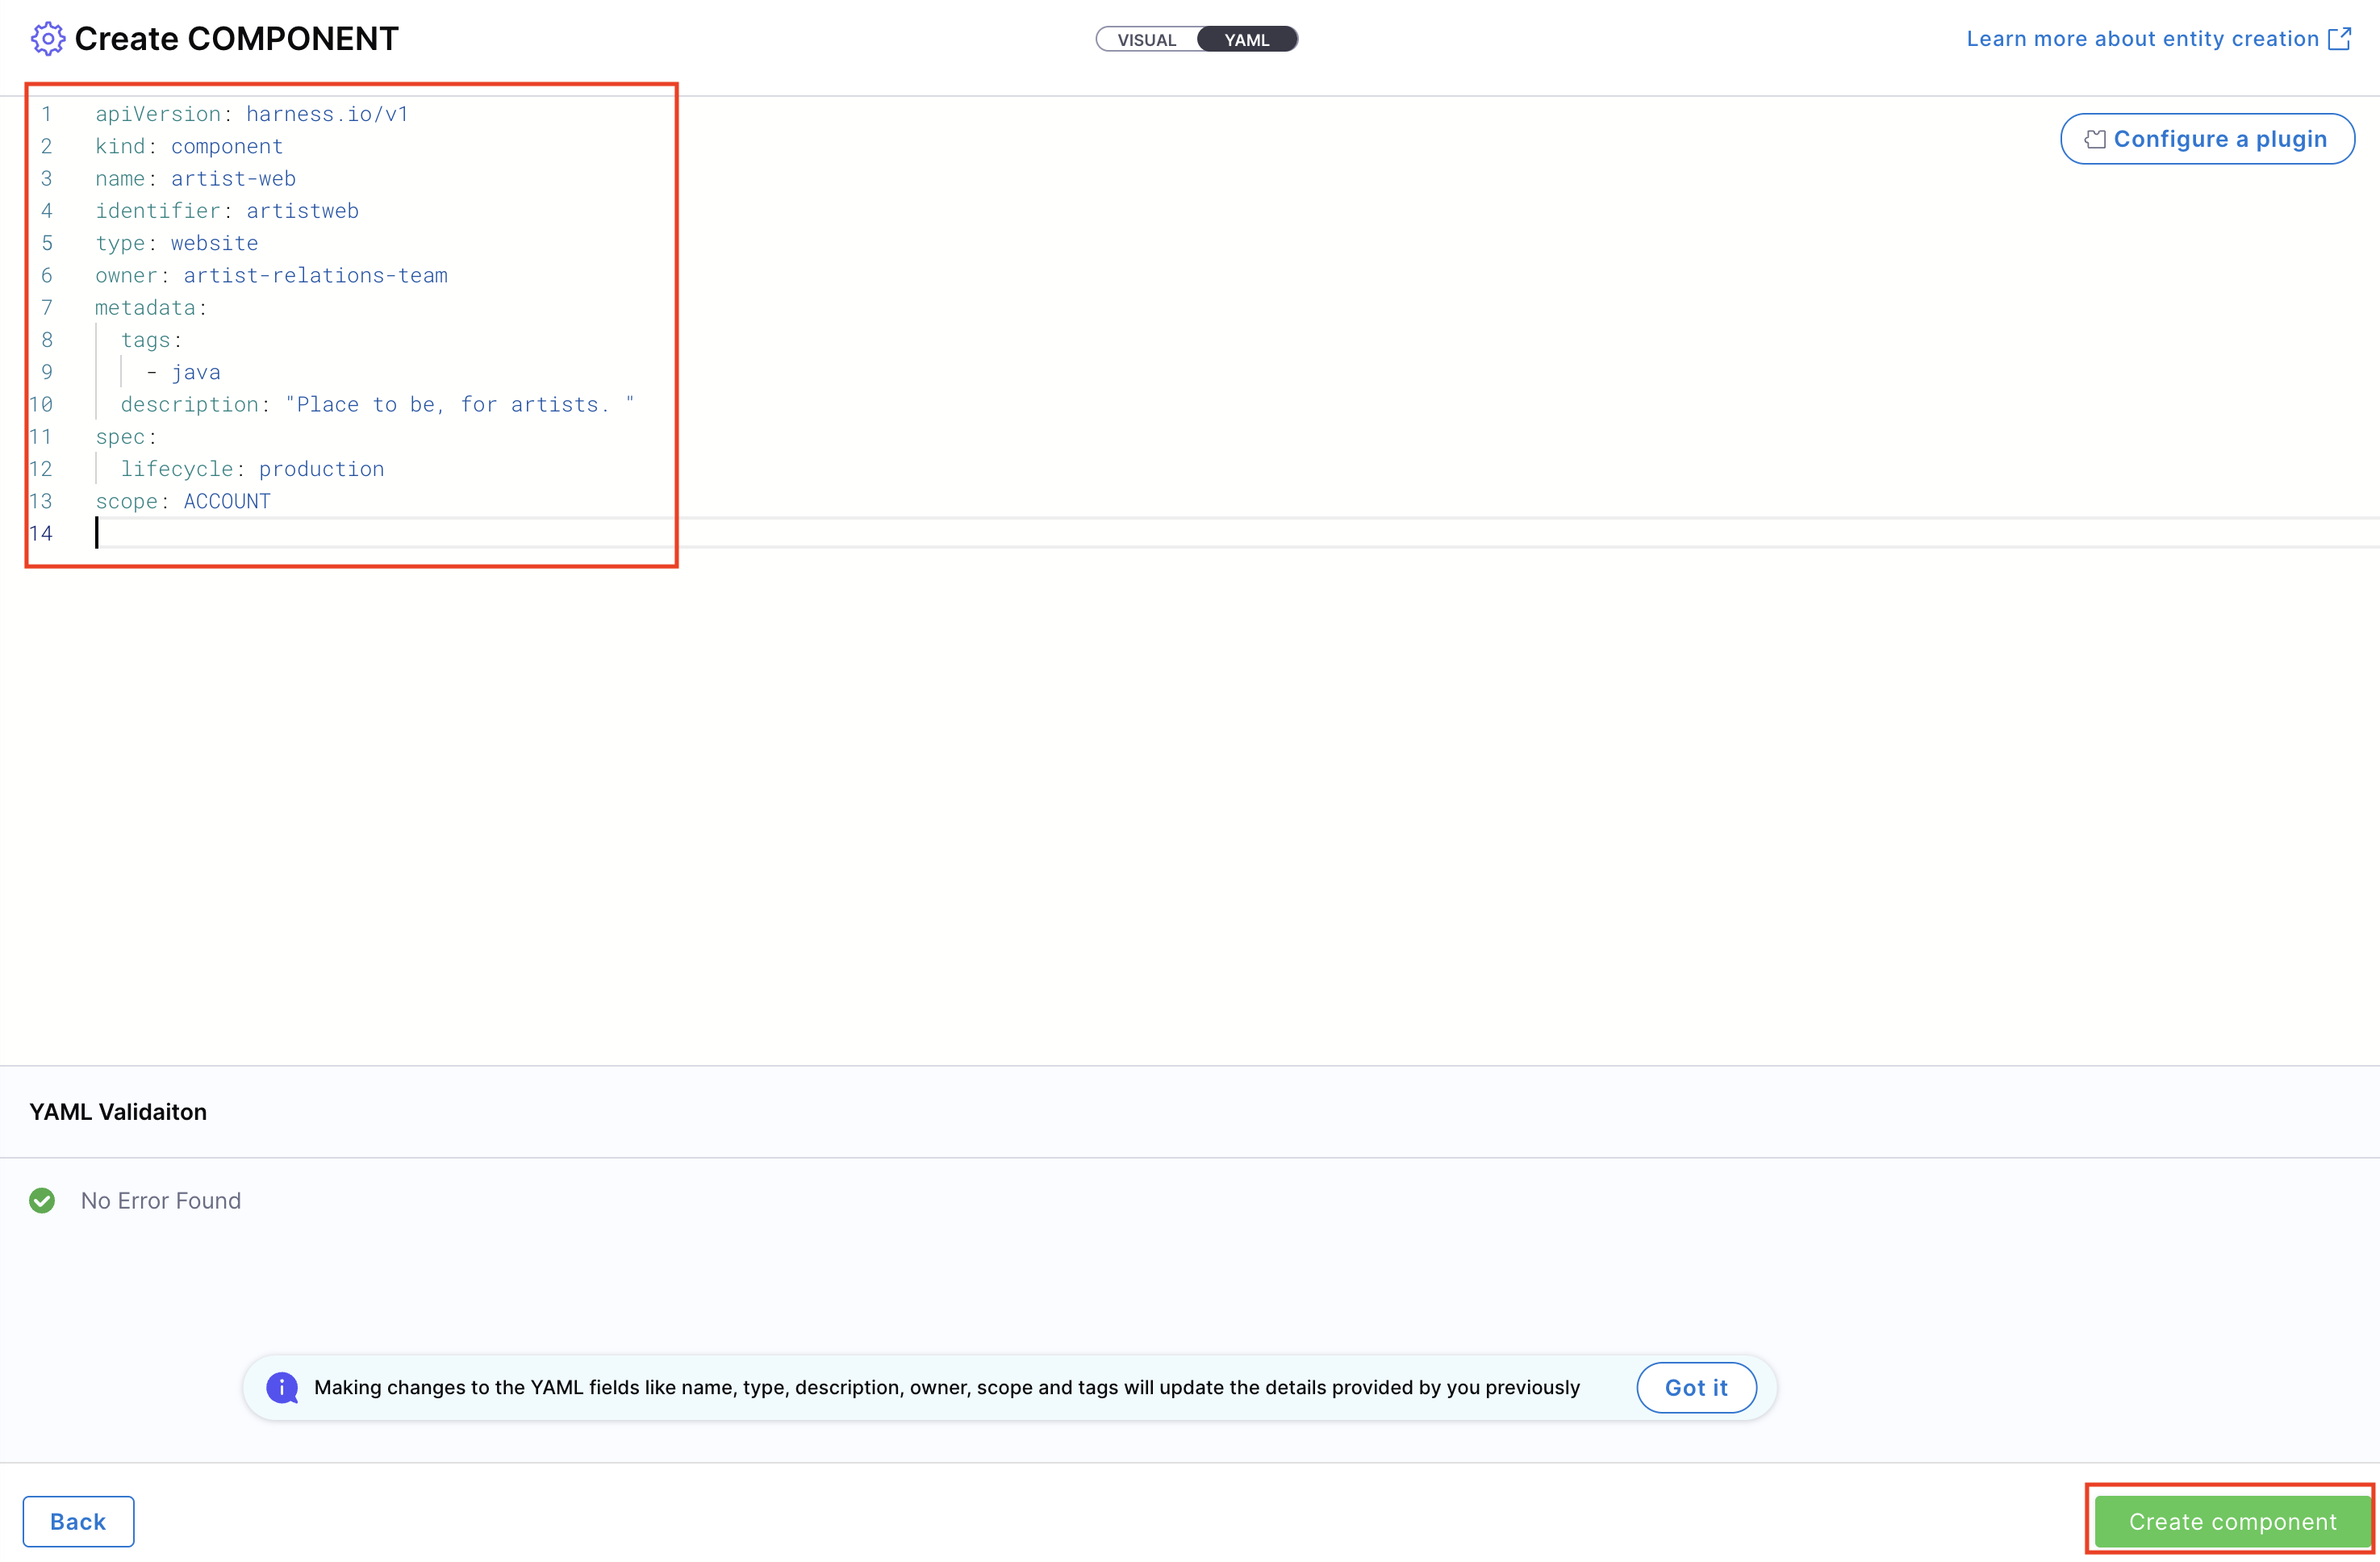
- Click “Review YAML” to view the synchronized YAML. Changes in the Visual View reflect live in the YAML View.
Note: YAML validation is performed to ensure compatibility with the Harness-native Catalog YAML model. Any errors will be shown in the Validation logs.
- If applicable, configure a plugin by referring to its documentation and adding the necessary annotations in the Catalog YAML.
- Once completed, click “Create Component” to finalize and register the entity.
To create a Component using Catalog YAML:
-
Navigate to Create in the sidebar, and select Component.
-
In the Visual View, switch to YAML View via the toggle at the top.
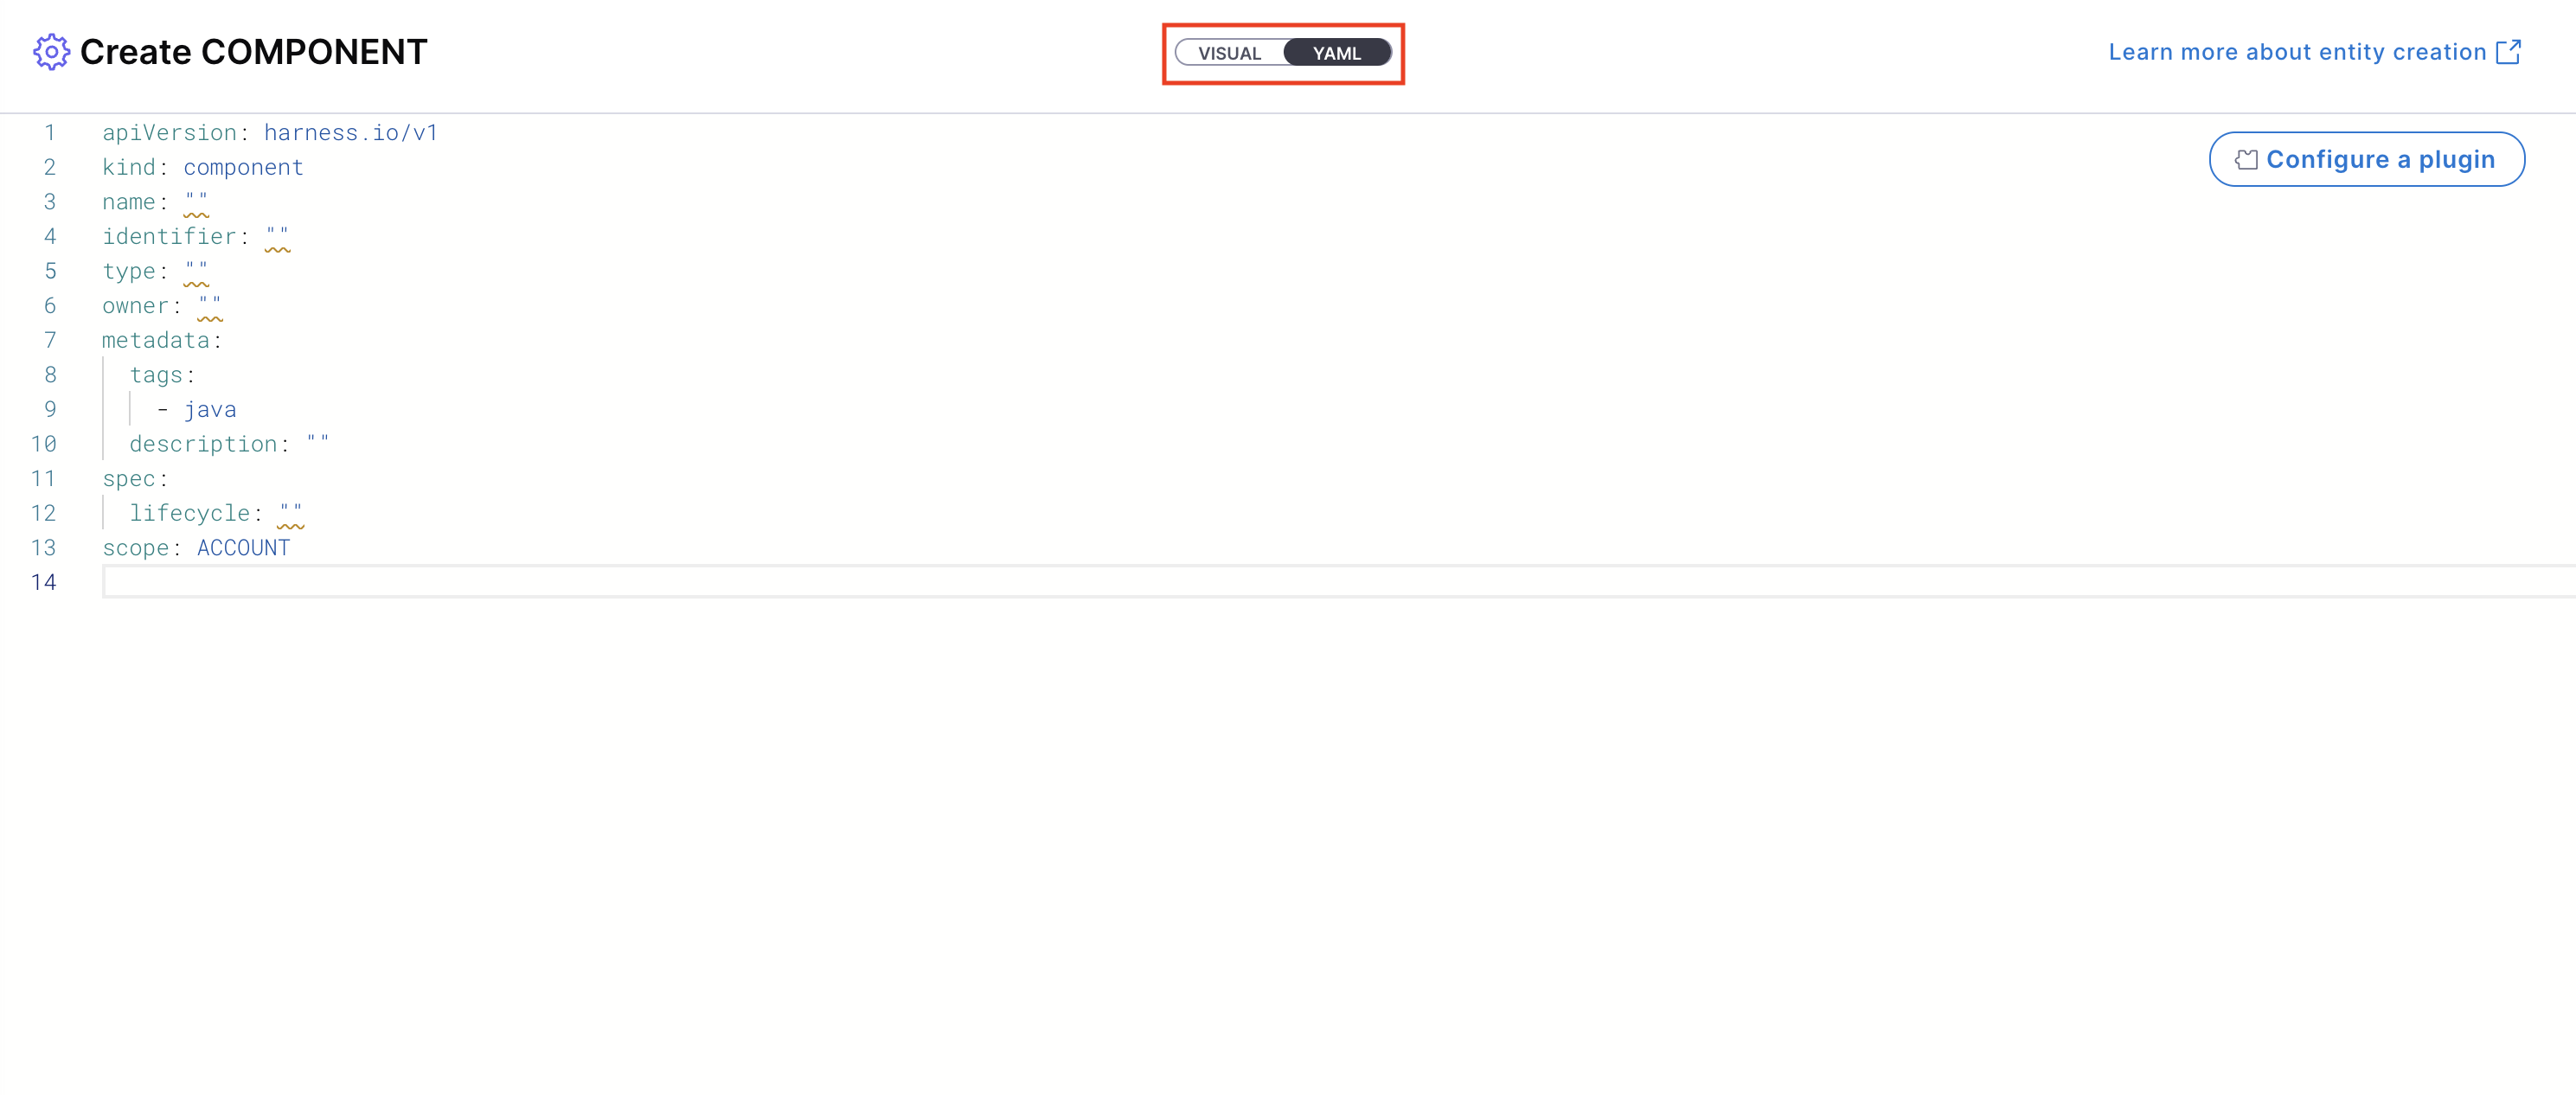
-
Paste your existing Backstage YAML if available. Harness will auto-convert it into the native format.

-
Define the scope of the entity in two ways: either switch to the Visual View and select the desired scope, or specify the projectIdentifier or orgIdentifier directly in the YAML to set the project or organization scope.
- Add any plugin configurations by including the relevant annotations.
- Click “Create Component” to complete the process and register your entity.
Delete an Entity (IDP 2.0)
You can remove any entity from the Catalog using the steps below:
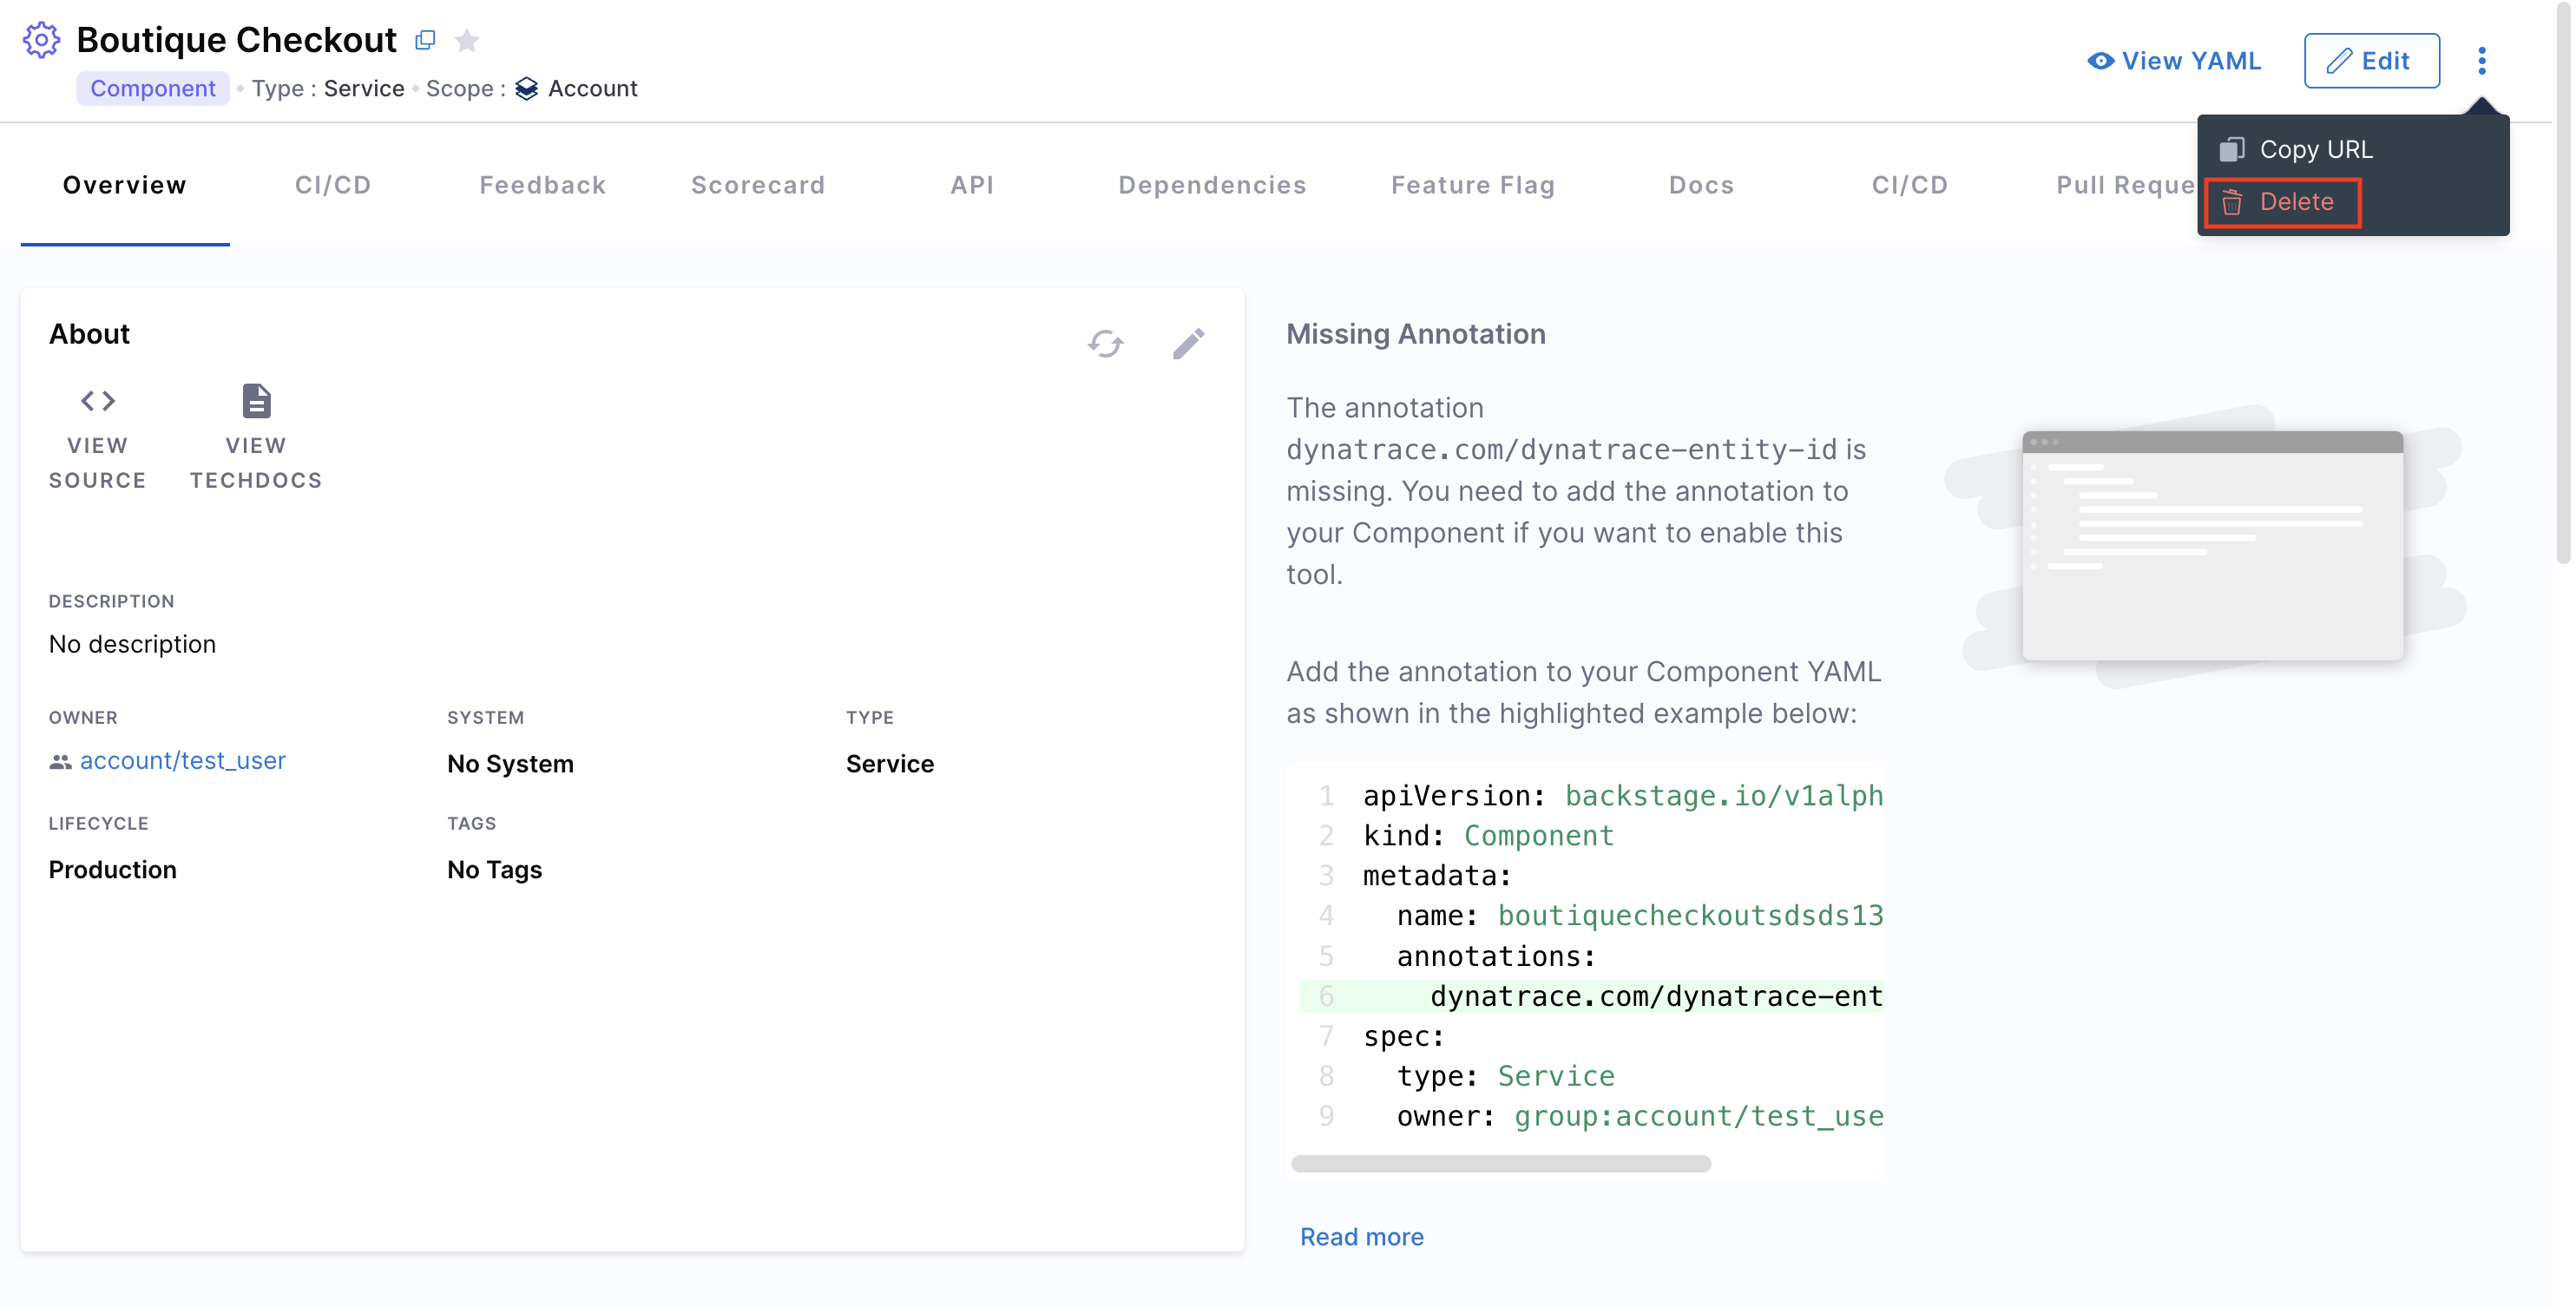
- Open the Software Catalog and locate the entity to delete.
- Click the three-dot menu on the entity card or details view.
- Select Delete from the dropdown. The entity will be permanently removed.
Next Steps (IDP 2.0)
Now that you've learned how to create, populate, and delete Catalog entities, here’s what to explore next:
- Deep dive into the Catalog Data Model to understand entity types and relationships.
- Learn the structure of Catalog YAML and how to author compliant definitions.
- Customize and manage a custom Catalog UI for tailored workflows.
- Learn how to configure RBAC for Catalog entities.
In Harness IDP, software components represent entities within your organization's ecosystem, such as services, libraries, APIs, or other resources. These components are defined in a catalog-info.yaml file, which describes their metadata, ownership, relationships, and lifecycle.
Let's start by adding your software components to IDP. To do this, create a catalog-info.yaml file in your Git repository and register its URL to add the component to your catalog.
Create a new catalog-info.yaml (IDP 1.0)
- To add a software component, you need to create a
catalog-info.yamfile in its repository. In the case of a mono-repo, this file should be created at the root of the repository. While the file can technically reside anywhere (e.g.,.harness/catalog-info.yaml), placing it in a standard location ensures consistency. You can use the following YAML code as a template:
apiVersion: backstage.io/v1alpha1
kind: Component
metadata:
  name: my-new-service
  description: Description of my new service
  tags:
    - java
  links:
    - url: https://admin.example-org.com
      title: Admin Dashboard
      icon: dashboard
      type: admin-dashboard
spec:
  type: service
  lifecycle: production
  owner: team-a
  system: project-x
Following are the key fields that you must update:
metadata.name. This should be a unique name for your component. Usually, it is the name of the service.metadata.description- A description for your new component.spec.type- The new software component could be aservice,library,website, or any other type.spec.owner- The user group identifier of the team that owns the component.
- Once the file is created in your Git repo, copy the full URL to the file. For example,
https://github.com/harness-community/idp-samples/blob/main/catalog-info.yaml.
Register the software component (IDP 1.0)
- Next, navigate to your Harness IDP module, and from the left navigation menu, select Register.
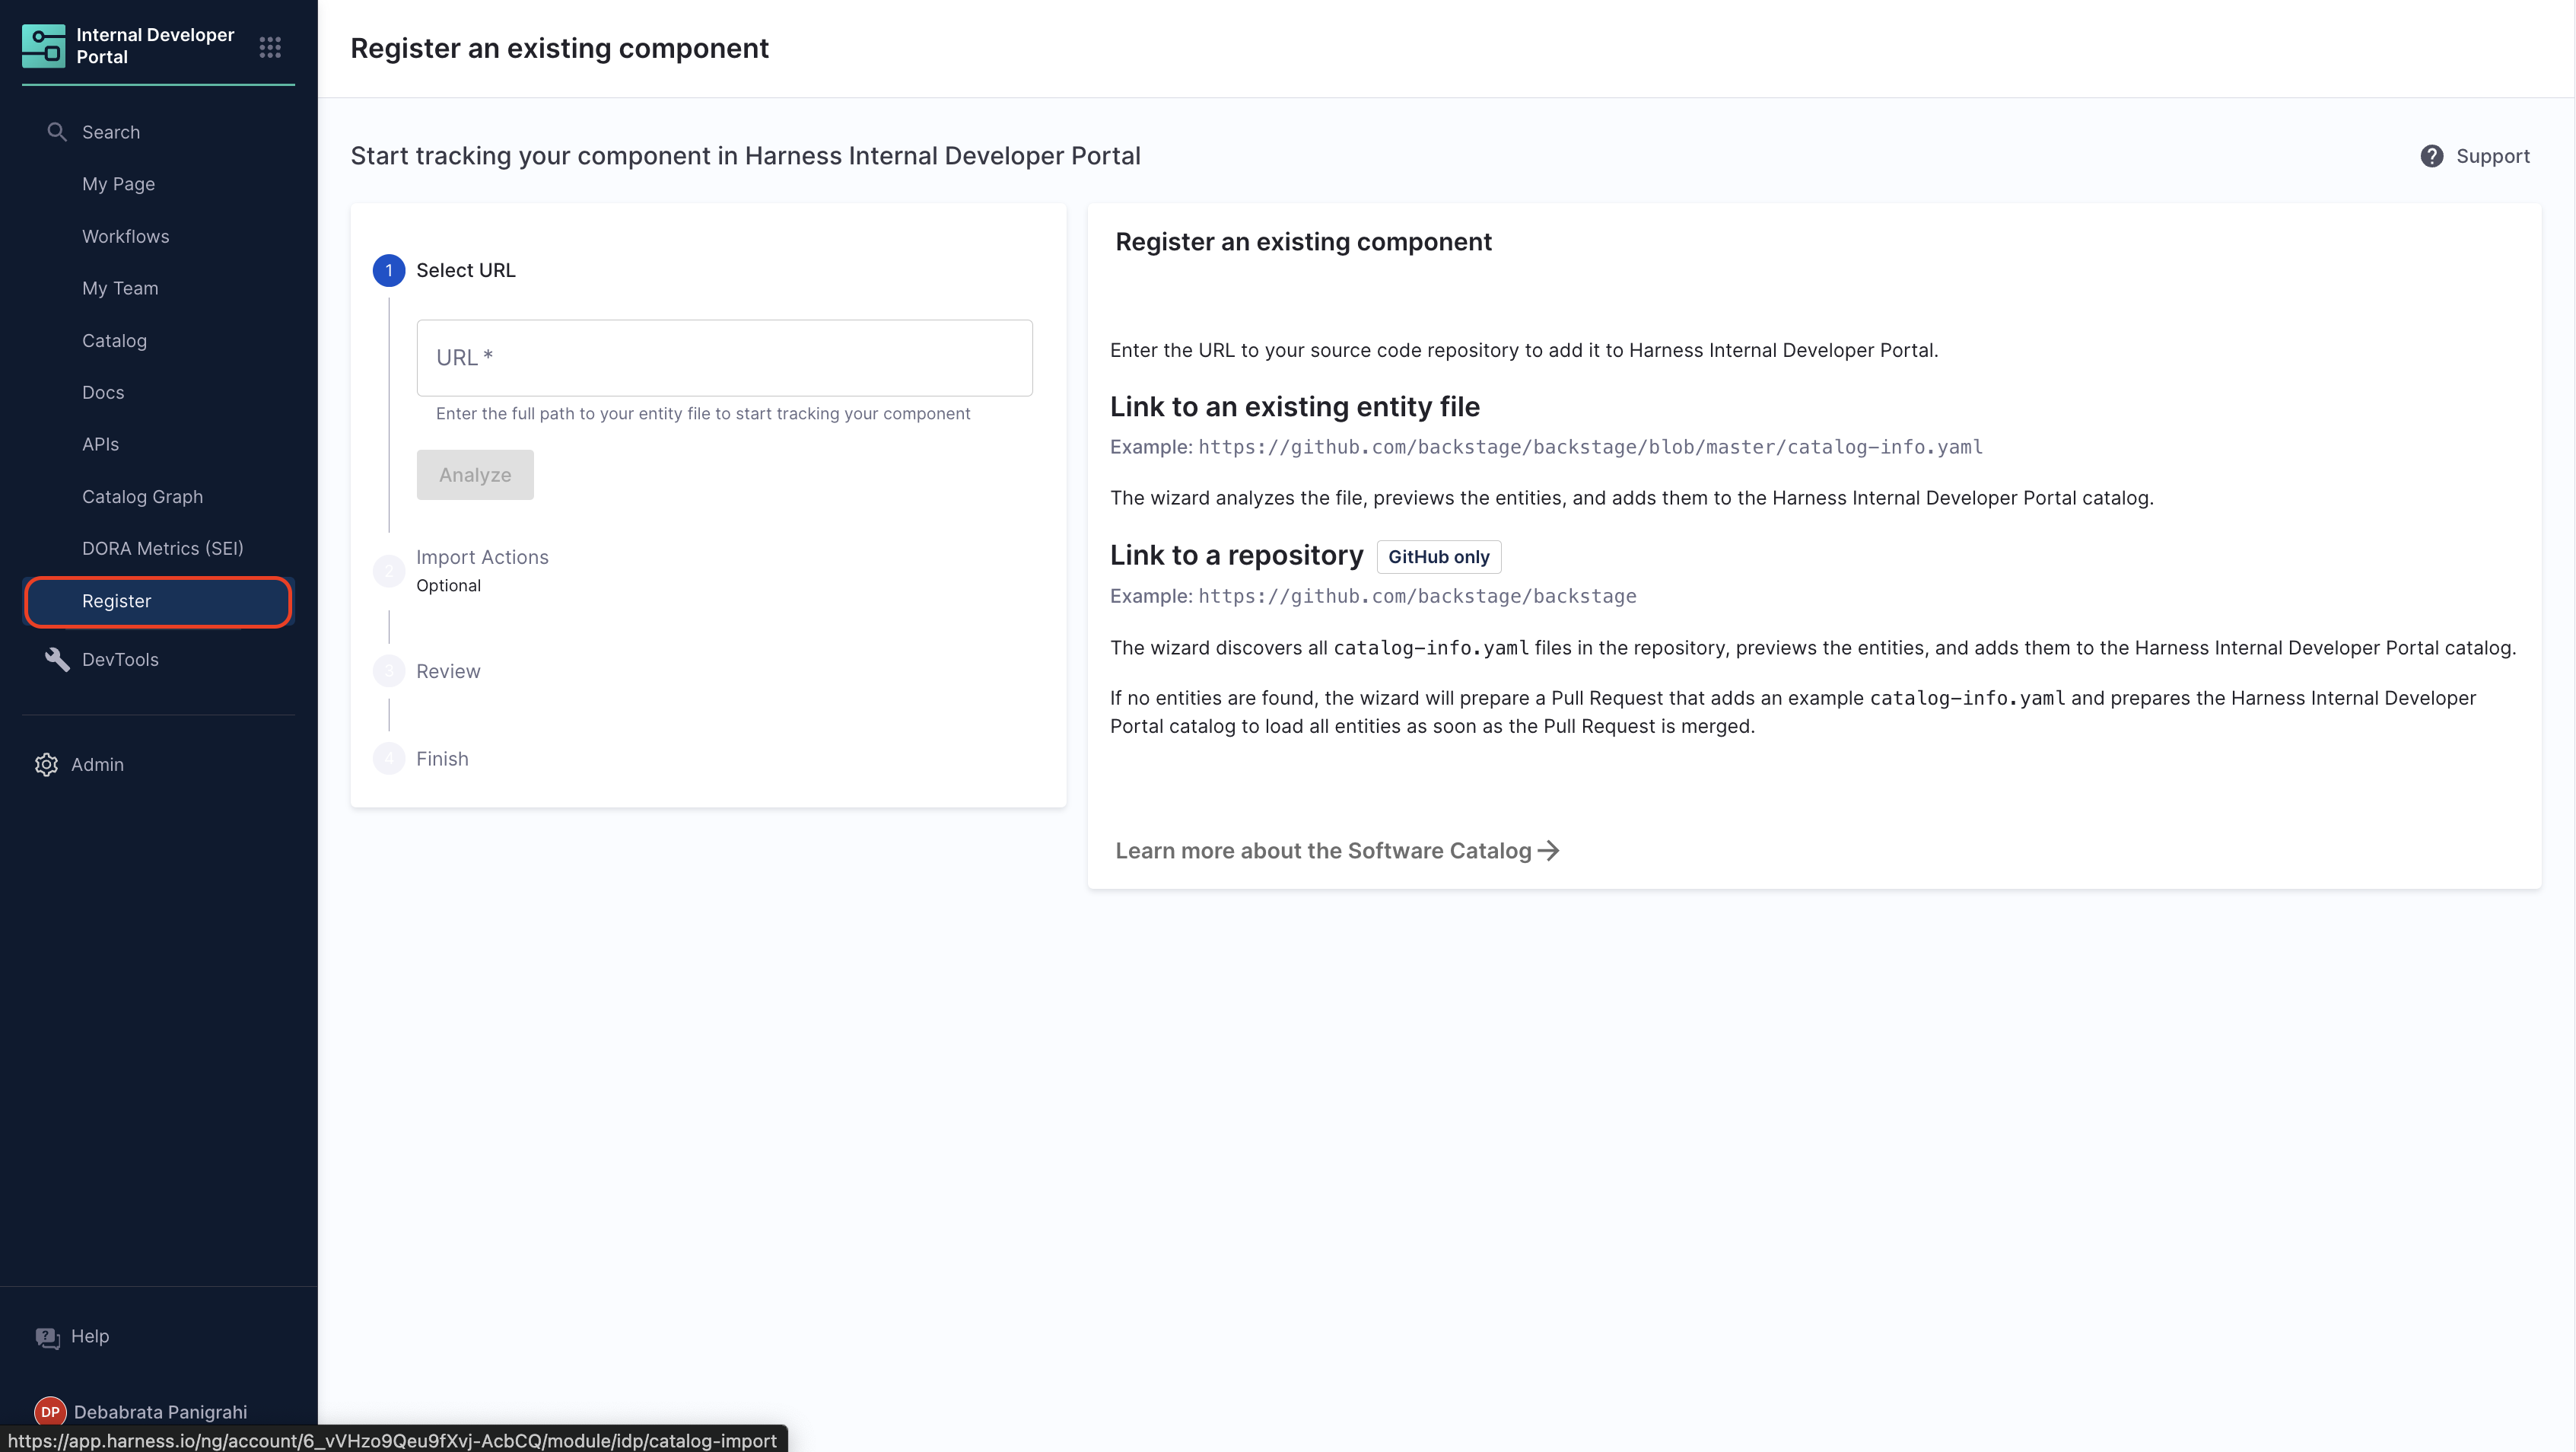
- Other Git Providers
- Harness Code Repository
- Enter the URL to your new
catalog-info.yaml.
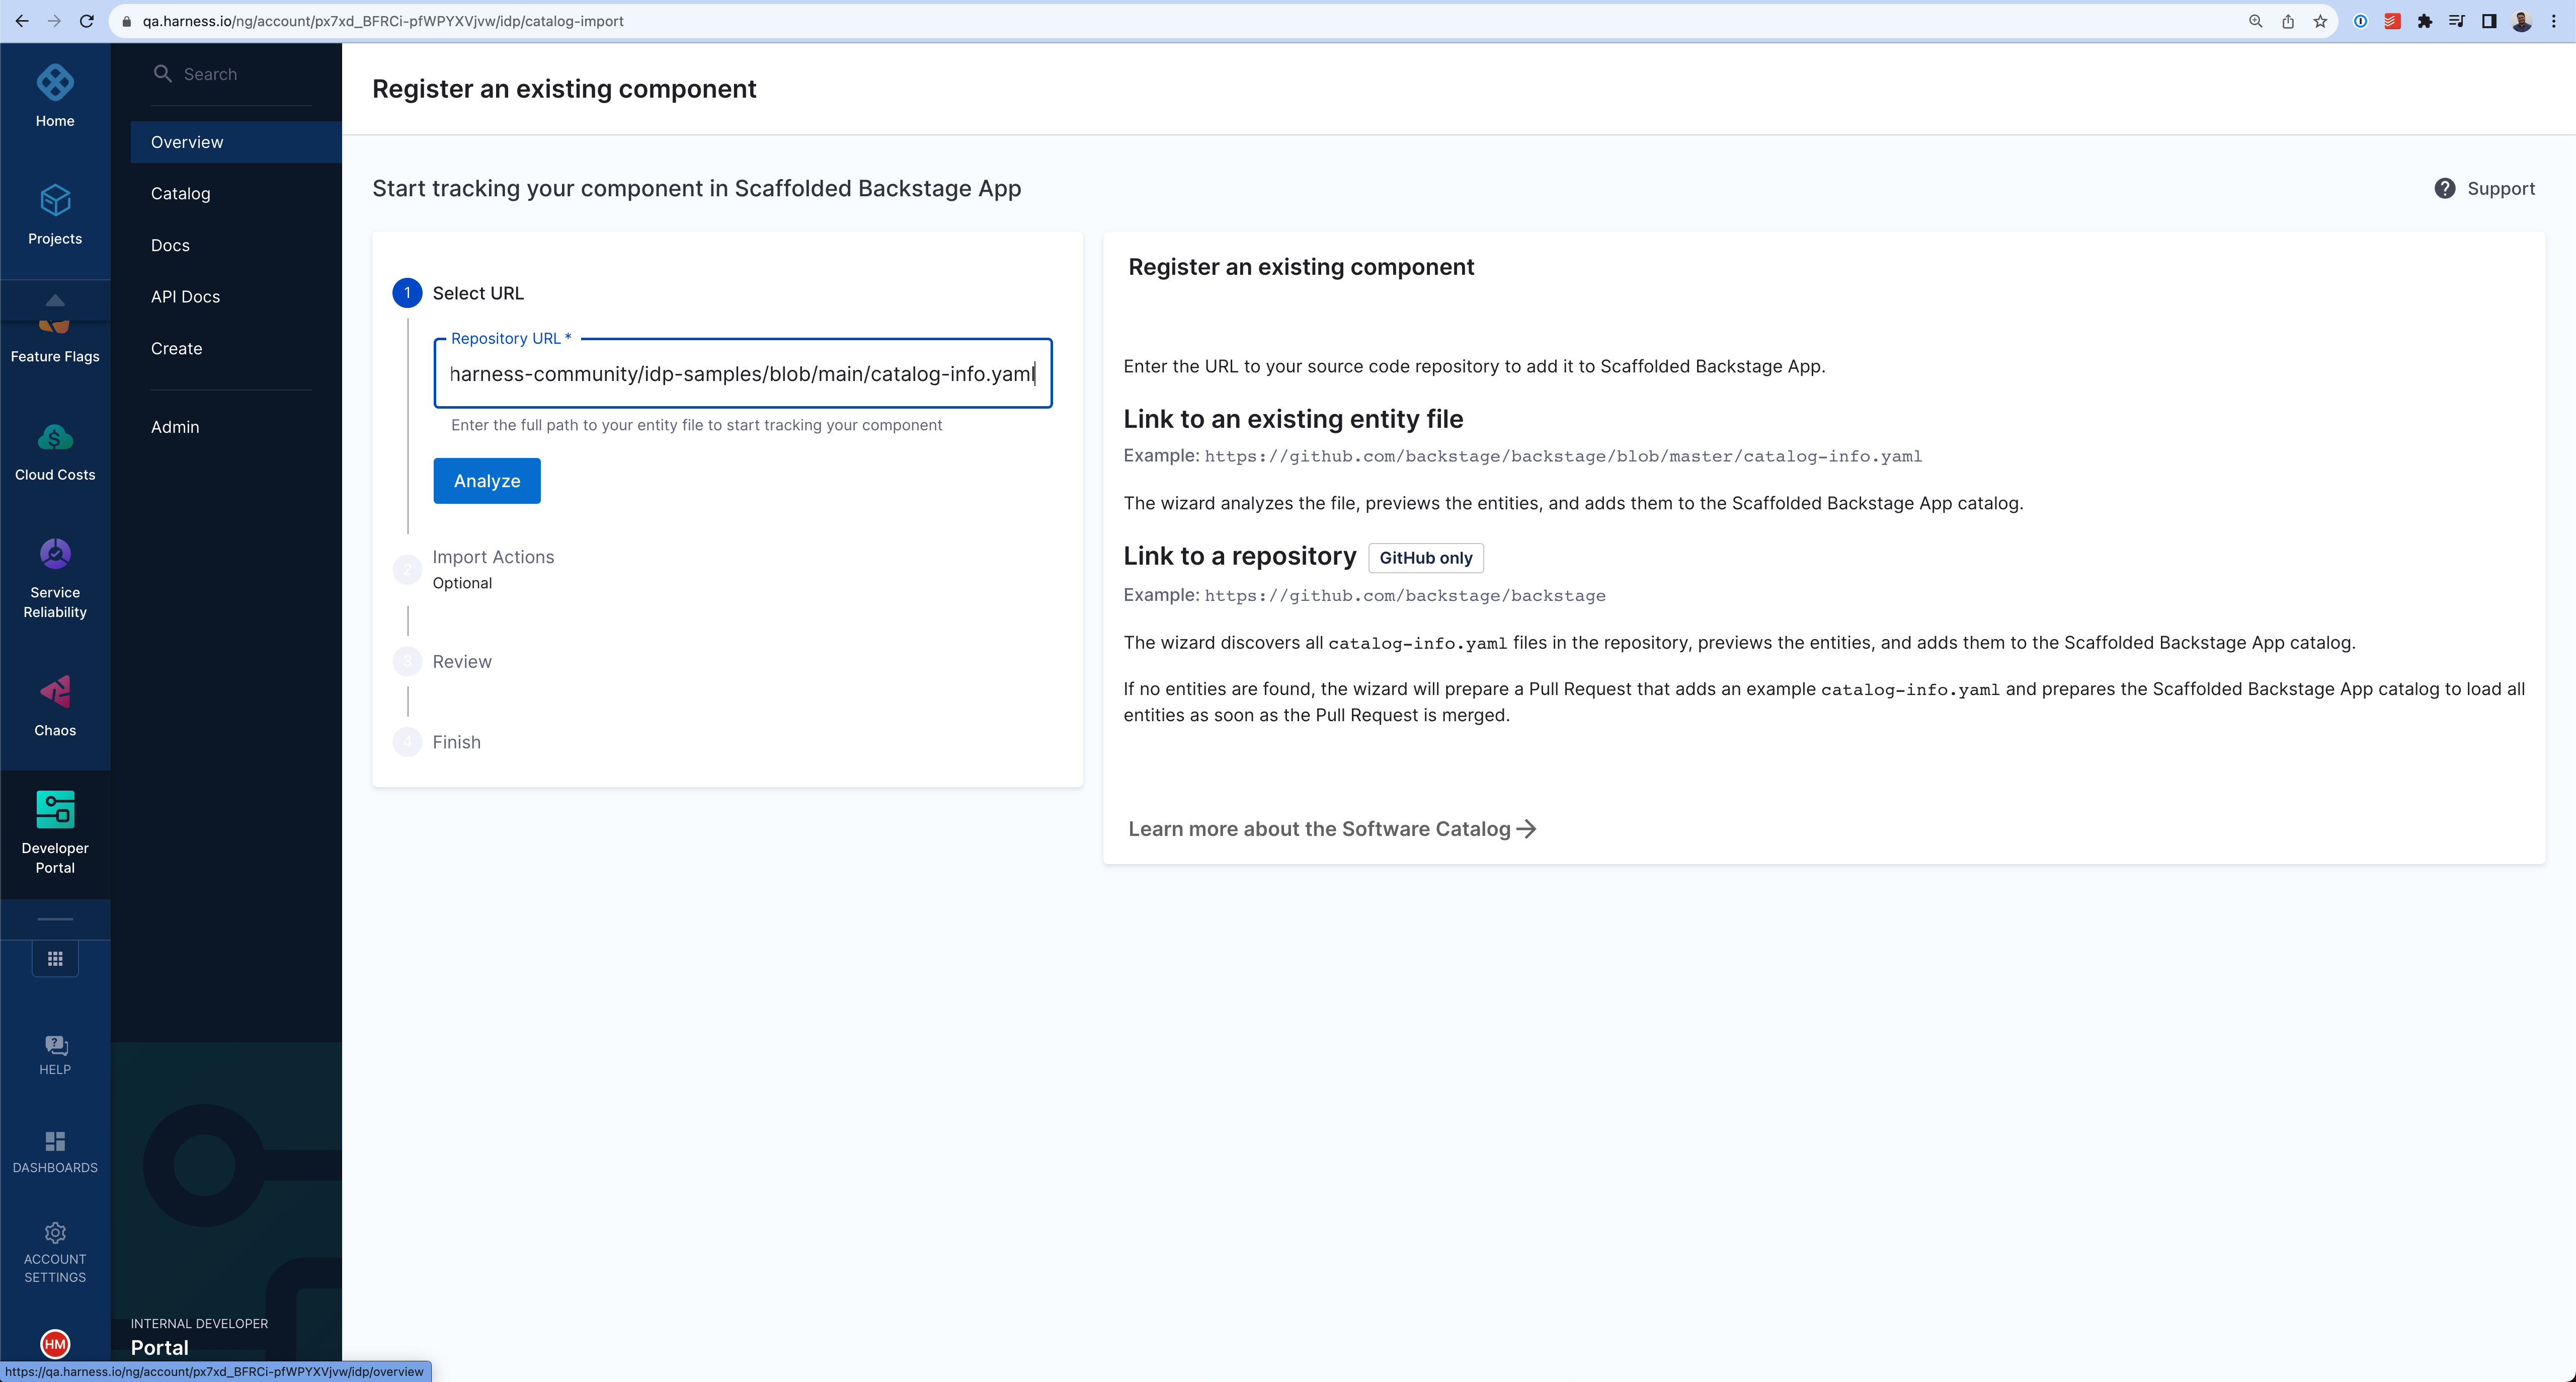
- Copy the URL for
catalog-info.yamland paste it on the field to Register the component.

- Select Import.
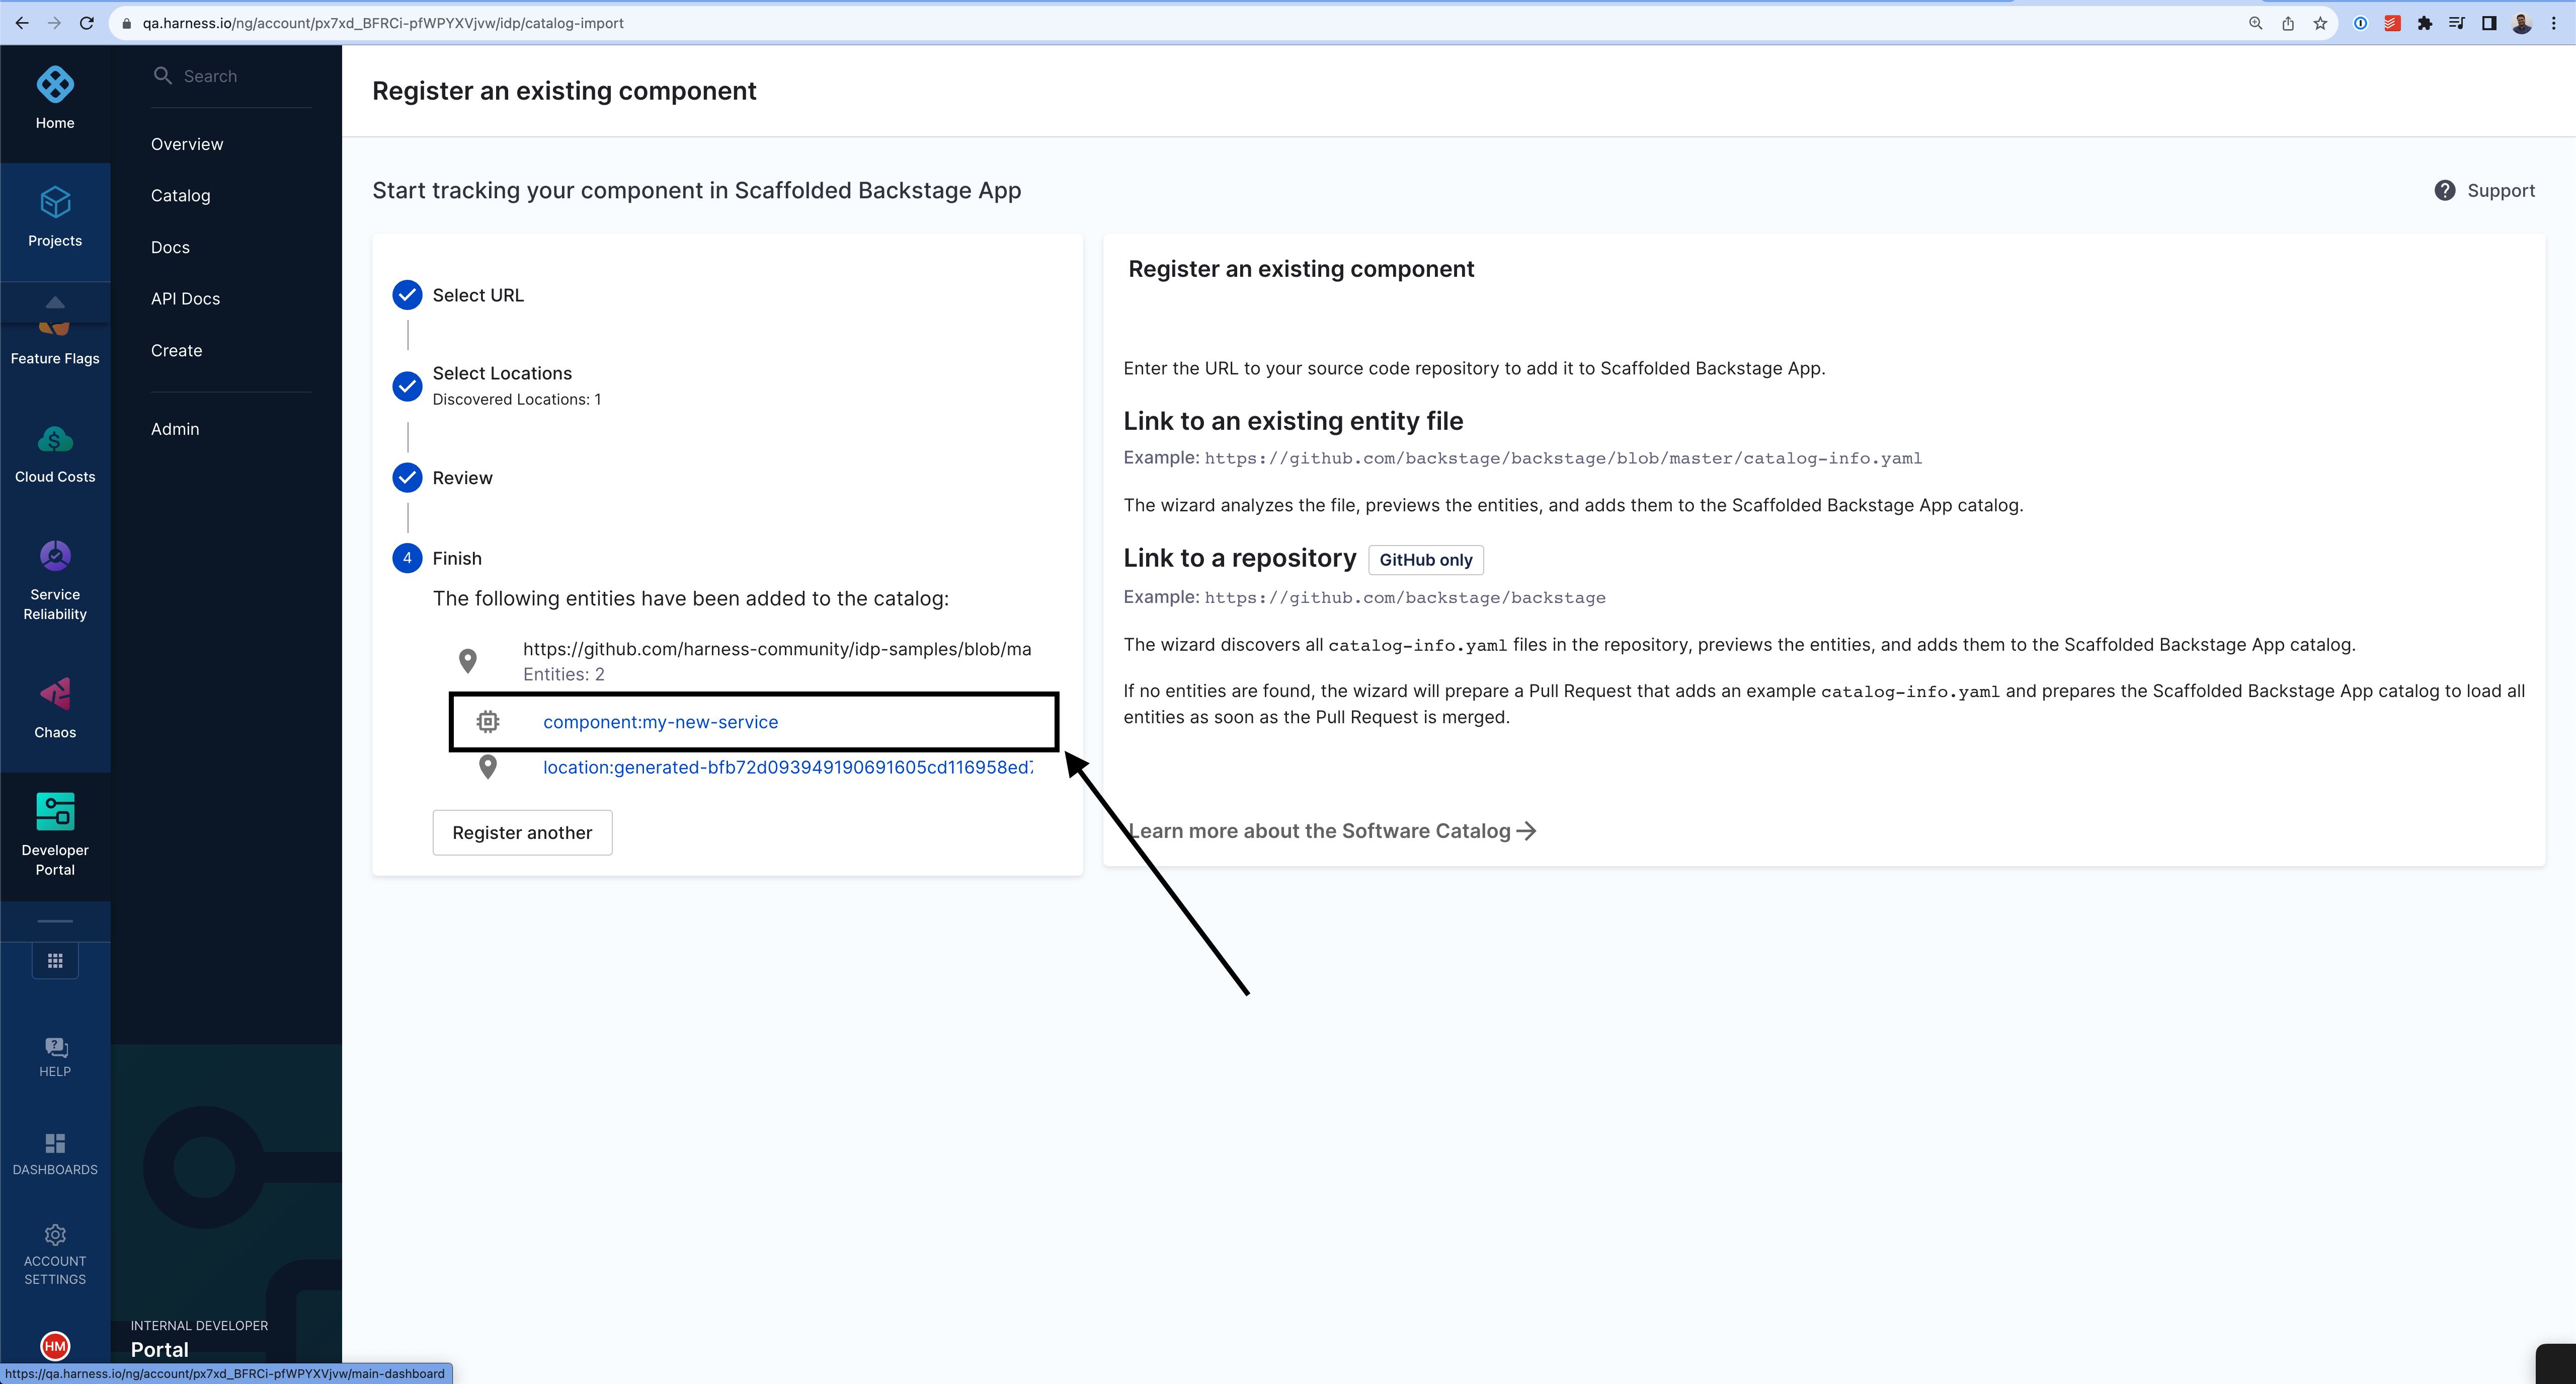
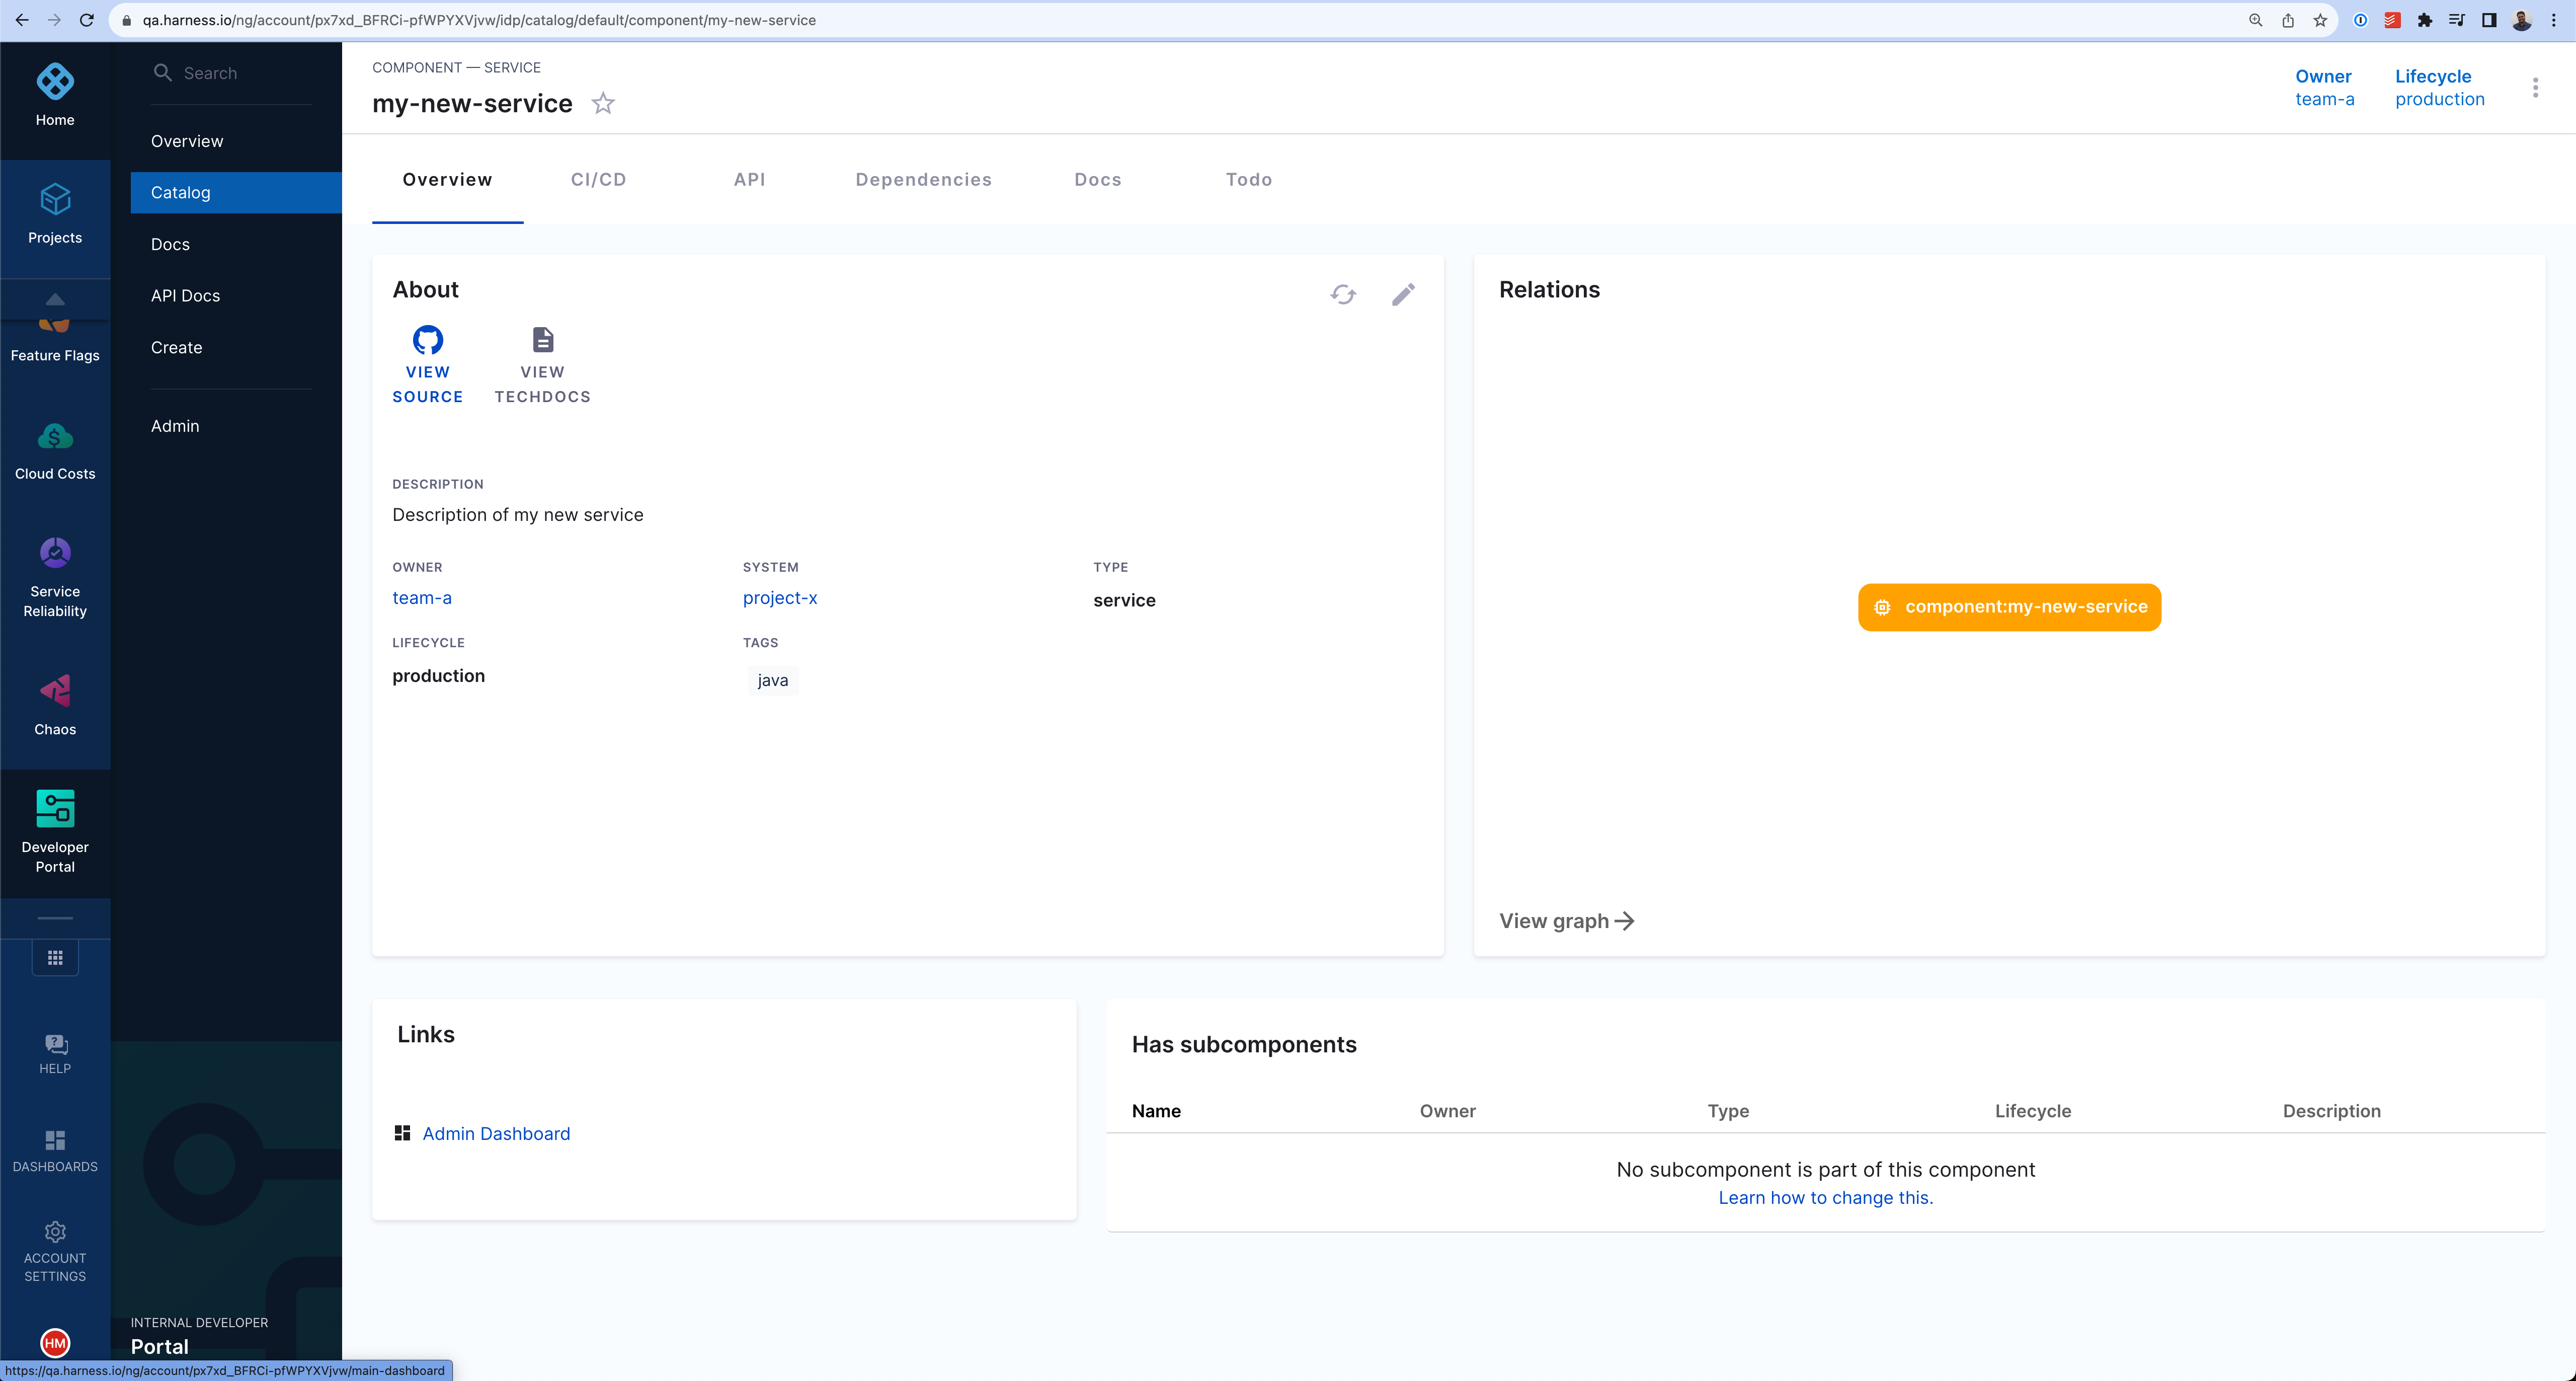
The new component will be available in your catalog.
Delete/Unregister Software Components (IDP 1.0)
- Navigate to the Catalog page and select Component under Kind. Here, we will deregister the software component registered above.
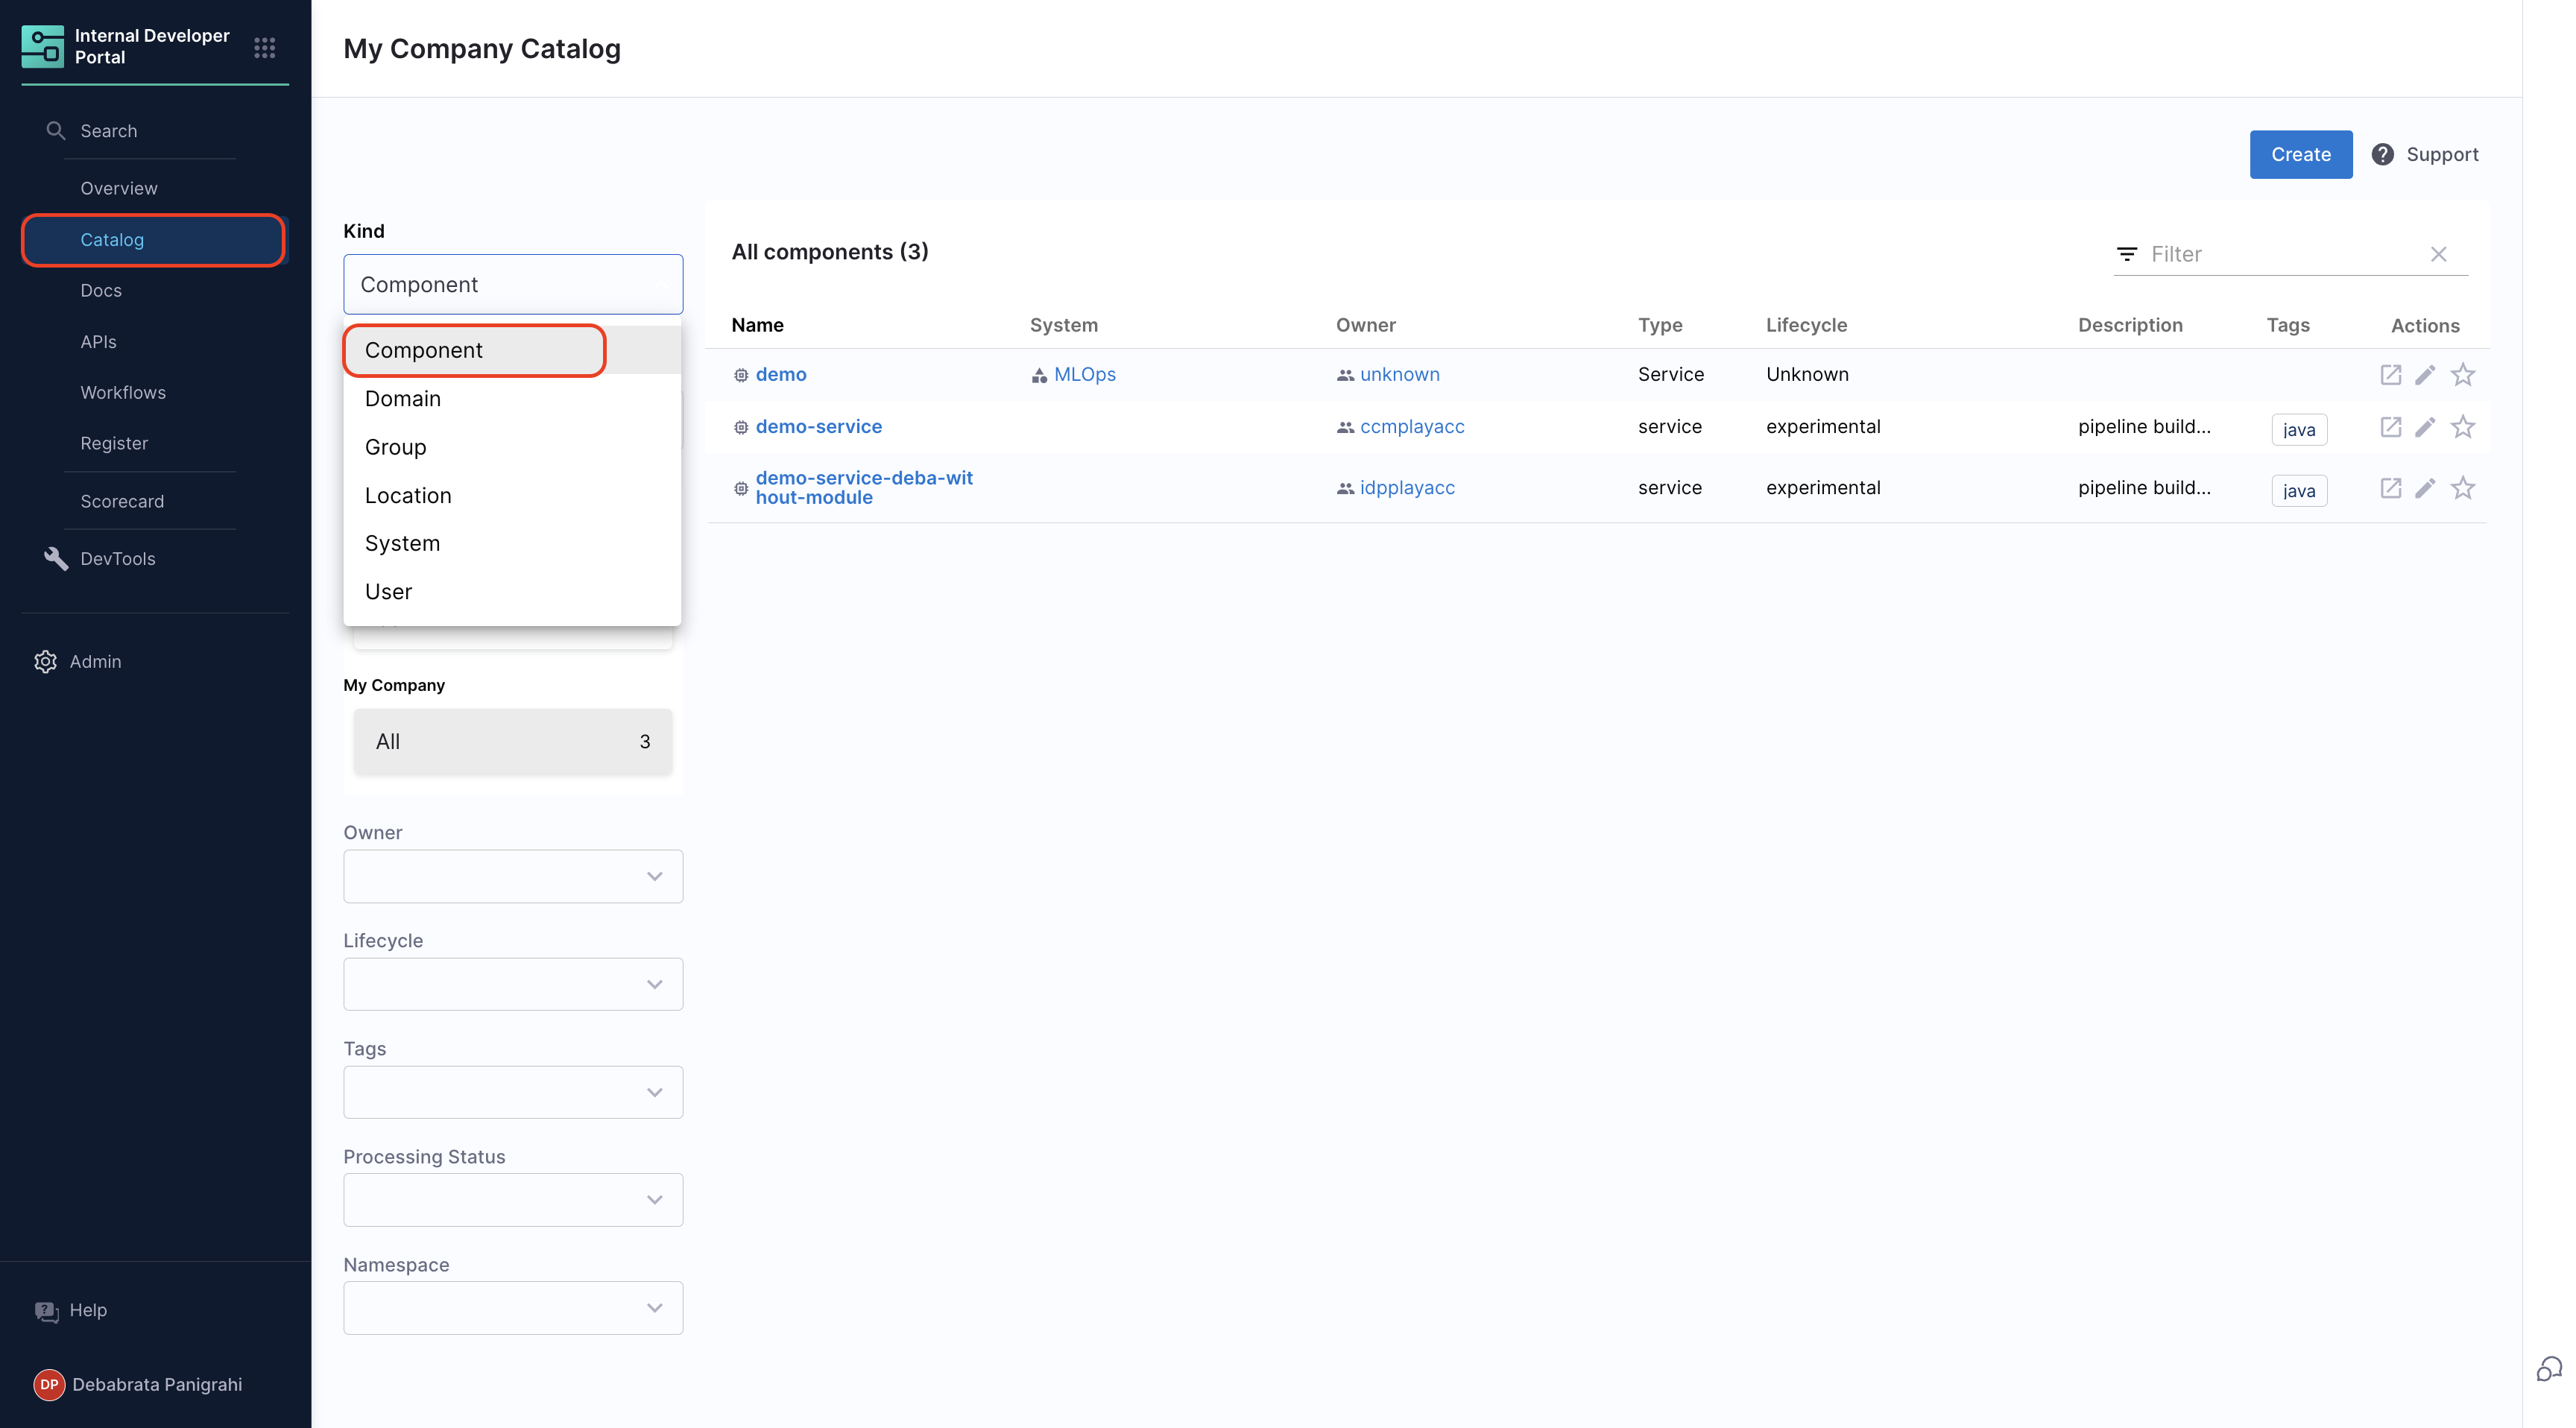
- Select the component name you want to Unregister from the list
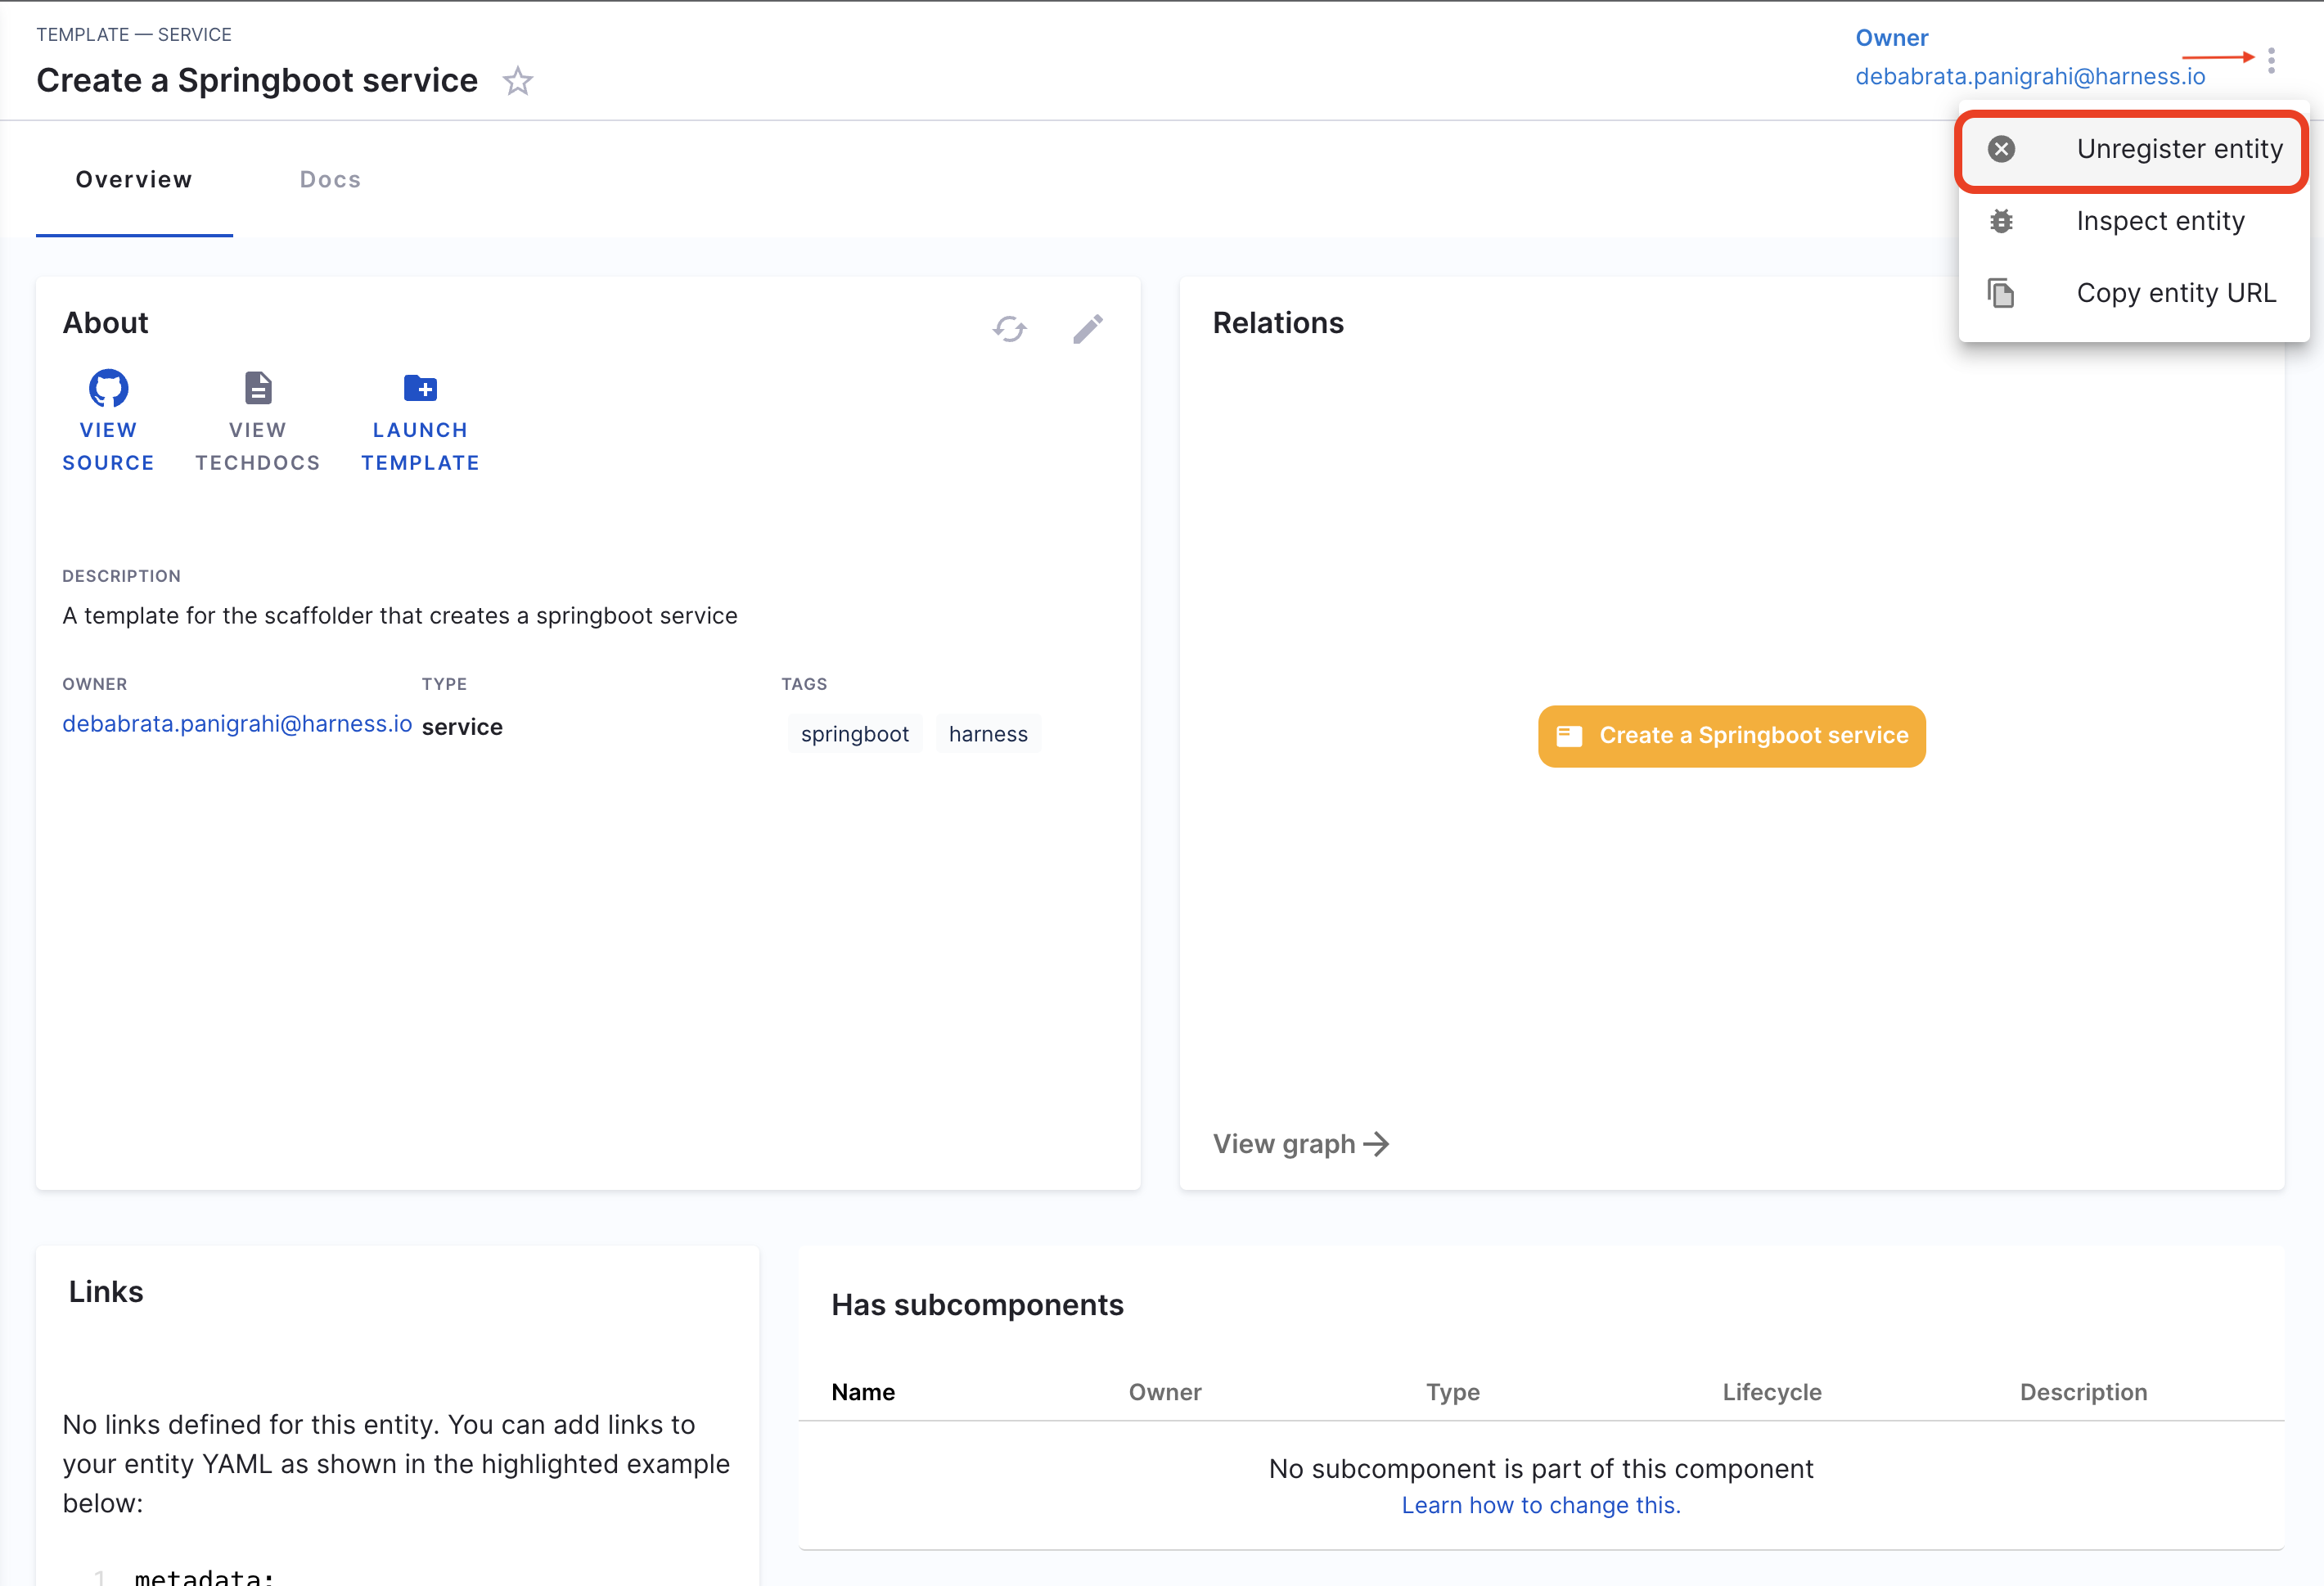
- Now on the component overview page, click on the 3 dots on top right corner and select Unregister Entity.
- Now on the Dialog box select Unregister Location.
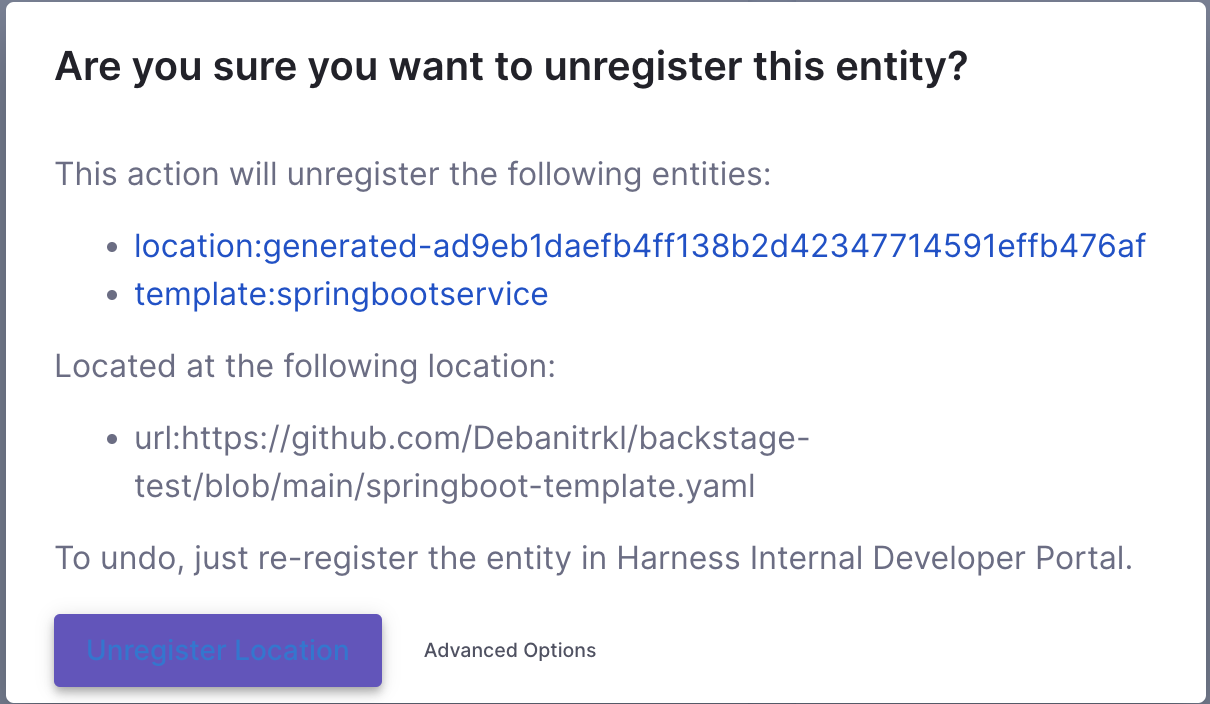
- This will delete the software component.
Troubleshooting (IDP 1.0)
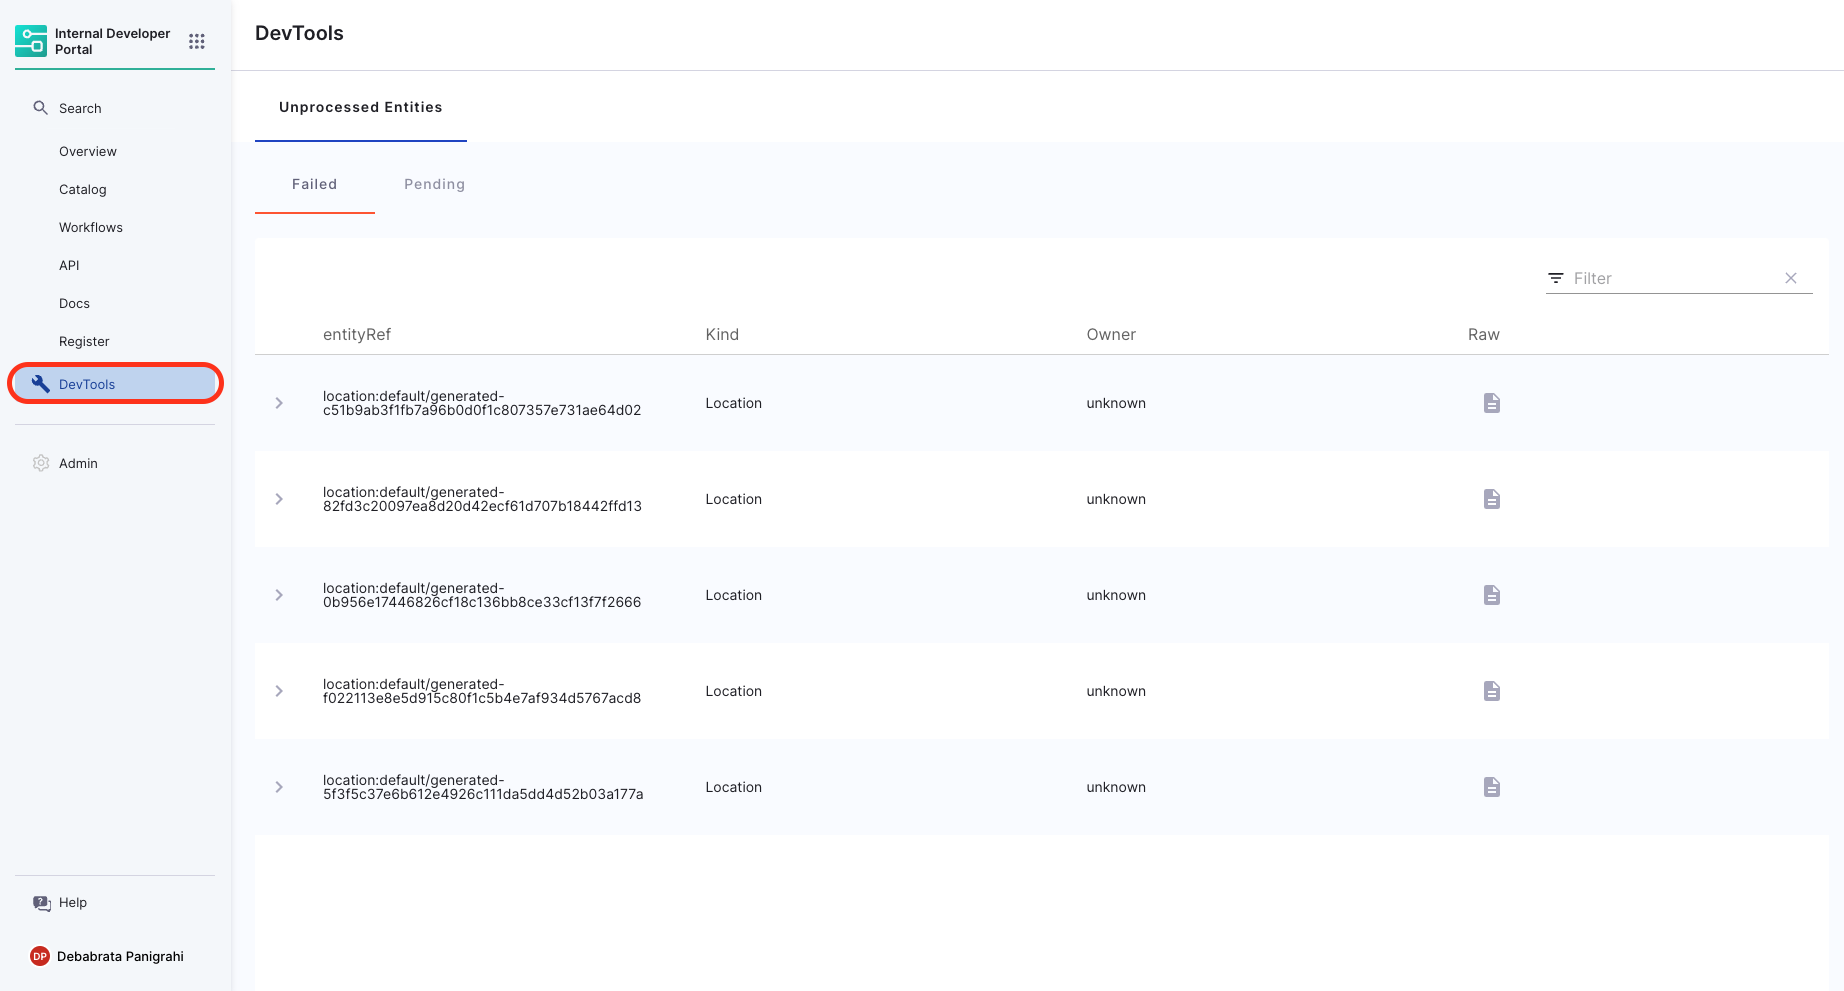
Failed to register
If, after registering an entity, you're unable to find the same in your catalog, check the Devtools Plugin for Unprocessed Entities. If it's under the Pending tab, wait a few minutes for registration to complete. If it's under the Failed tab. Try re-registering the entity.
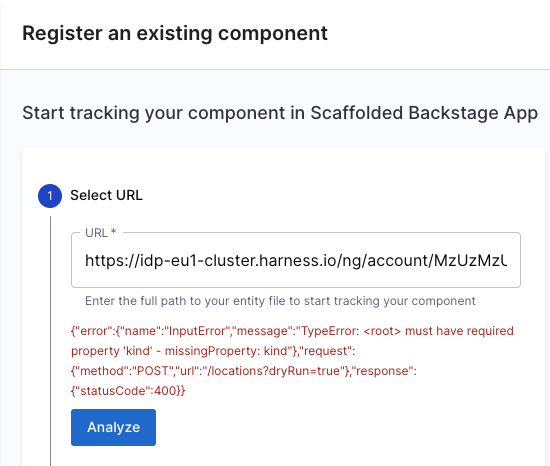
Missing required fields/Invalid YAML schema.
In case of a InputError, check for missingProperty details and add the required property to your catalog-info.yaml.