Workflows RBAC
This RBAC guide is applicable only to IDP 2.0 customers, as the RBAC Harness platform hierarchy is available exclusively in IDP 2.0.
- To learn how to upgrade, refer to the IDP 2.0 Upgrade Guide.
- If you're using IDP 1.0 and want to implement access control, please refer to the Access Control Guide for IDP 1.0.
With the release of Granular RBAC in IDP 2.0, you can now control access to Workflows in your Harness IDP. This means you can restrict who can create and execute Workflows across your IDP setup. Workflows can be created at all available scopes: Account, Organization, or Project. To learn more about permissions and scopes, visit the IDP 2.0 Data Model.
If you're using Harness IDP 2.0, please ensure you have reviewed the IDP 2.0 Overview guide and are familiar with the key steps for upgrading to IDP 2.0. To enable IDP 2.0, you must raise a support ticket to activate the IDP_2_0 feature flag for your account.
RBAC Workflow in Harness IDP
Before configuring RBAC for Workflows, ensure you’ve reviewed the Scopes, Permissions, and RBAC Components.
Here’s the step-by-step workflow for configuring RBAC in Harness IDP:
- Go to your administrative settings and select the scope (Account, Org, or Project) where you want to configure RBAC for Workflows.
- Create roles with the required permissions. For example: If you want to configure RBAC for Workflow creation, ensure the role includes the Create/Edit (Workflow) permission.
- Create resource groups to apply RBAC to a specific set of resources for the principal. For example: To control Workflow access, ensure the Workflow resource is added to the resource group.
- Create user groups and add users.
- Assign roles and resource groups to the user groups or users.
- If not already configured, set up authentication.
Permissions for Workflows
The following permissions can be configured for Workflows when creating a custom role:
| Permission | Description |
|---|---|
| Create/Edit | Allows users to create Workflows and modify their configurations. |
| View | Allows users to view Workflows but not create, modify, or delete them. |
| Delete | Allows users to delete Workflows. |
| Execute | Allows users to execute Workflows. |
These permissions can be configured when creating or modifying a custom role. Choose the permissions that best suit the access level you want to grant. To learn more, see Manage Roles.
Workflow RBAC Example
You can access Administrative Settings from your Harness UI directly using the sidenavbar.
Configure RBAC for Project-Level Workflow Execution
This example walks through configuring RBAC to allow users to execute Workflows at a specific project level.
The configuration includes:
- Custom Role:
IDP Workflow Execute - Custom Resource Group:
All Workflow Execute Resources - Custom User Group:
Workflow Execute Users
The All Workflow Execute Resources group exists at the project scope and grants Execute access to all Workflows within that project. The IDP Workflow Execute role includes the Execute permission for Workflows.
Step 1: Create the IDP Workflow Execute Role
- In Harness, navigate to the project where you want to configure RBAC.
- Go to Project Settings → Roles under the Access Control category.
- Click New Role to create a new role.
- Name the role IDP Workflow Execute. (Description and tags are optional.)
- Click Save.
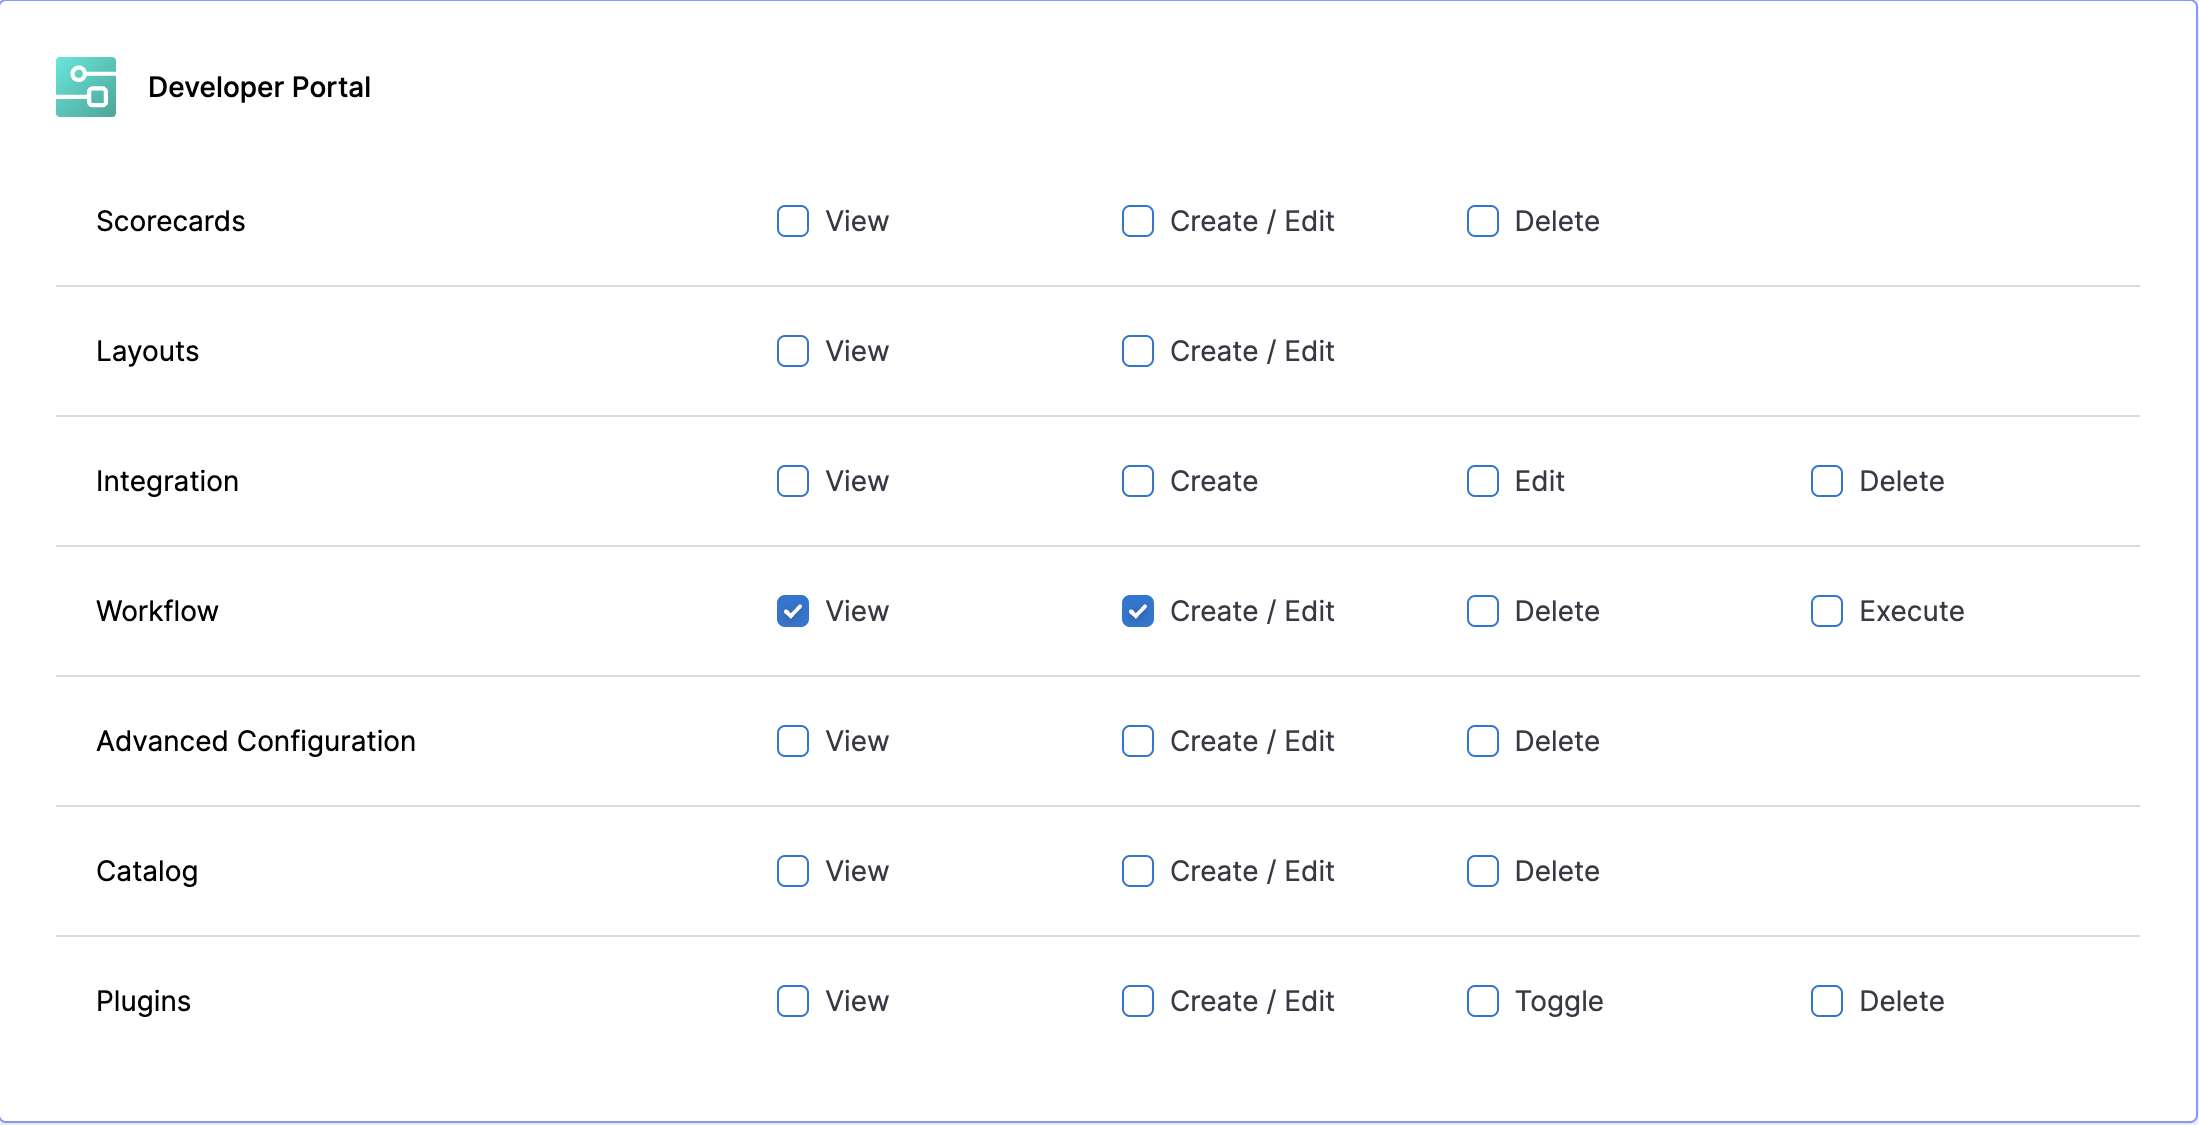
- Under Developer Portal → Workflow, select the Execute permission.
- Click Apply Changes.
Learn more about role creation and permissions: Manage Roles | Permissions Reference
Step 2: Create a custom Resource Group
- In the same project, go to Project Settings → Resource Groups under Access Control.
- Click New Resource Group.
- Name the group All Workflow Execute Resources. (Select a color; description and tags are optional.)
- Click Save.
- For Resource Scope, select Project only. (This restricts access to resources within this project only.)
- Under Resources, select Specified, then choose Workflow.
- Click Save.
If you need to allow Workflow execution at a higher scope (Org or Account), configure the role, resource group, and user group at that higher scope. Learn more: Manage Resource Groups
Step 3: Create the Workflow Execute Users User Group
- In the same project, go to Project Settings → User Groups under Access Control.
- Click New User Group.
- Name the group Workflow Execute Users. (Description and tags are optional.)
- Under Add Users, select the users to include.
- Click Save.
Learn more: Manage User Groups | Manage Users
Step 4: Assign the Role and Resource Group to the User Group
- In the same project, go to Project Settings → User Groups.
- Find the Workflow Execute Users group and click Manage Roles.
- Under Role Bindings, click Add.
- For Role, select IDP Workflow Execute.
- For Resource Groups, select All Workflow Execute Resources.
- Click Apply.
Learn more: Role Binding
This configuration grants members of the Workflow Execute Users group the ability to execute Workflows within the selected project scope only. To extend this capability across projects or orgs, configure the role and resource group at the appropriate higher scope (Org or Account).